
Your Neighborhood trusted CONTRACTOR
THE COMPLETE GUIDE TO POOL & SPA LANDSCAPE DESIGN IN SAN DIEGO
A Great Pool Starts With a Complete Outdoor Plan
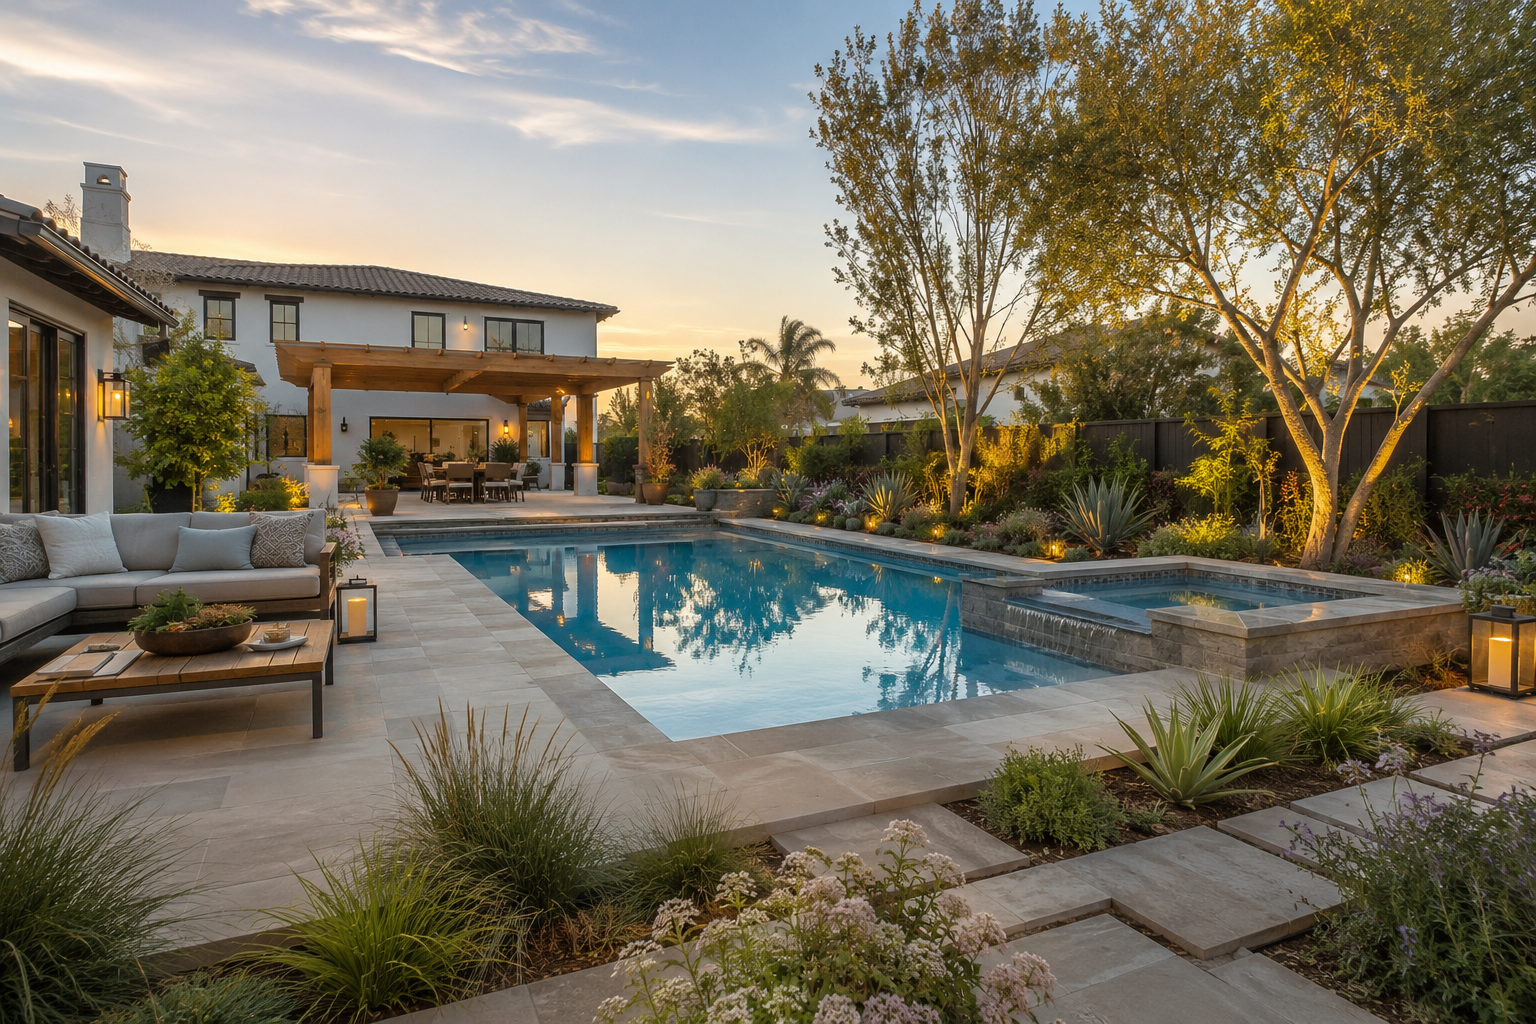
A swimming pool or spa can become the centerpiece of a backyard, but the most successful projects are about much more than the water itself. The pool, patio, planting, lighting, drainage, shade, entertaining areas, walkways, views, and architecture of the home should all work together as one complete outdoor environment.
That is why pool and spa planning should begin as part of a thoughtful Landscape Design Process.
Before deciding exactly where a pool should go, homeowners should think about how they want to use the entire backyard. Will the space be primarily for swimming and relaxing? Entertaining large groups? Family gatherings? Outdoor cooking? Quiet evenings around a fire feature? Or a combination of all of these?
Those decisions can influence:
Pool and spa placement
Pool size and shape
Patio and pool-deck dimensions
Outdoor dining and entertaining areas
Walkways and circulation
Steps and elevation changes
Sun and shade
Privacy
Views from inside the home
Outdoor kitchens and fire features
Planting areas
Landscape lighting
Drainage
Pool-equipment access
Future landscape improvements
At Nature's Elements Landscaping, we believe the goal is not simply to fit a pool into a backyard. The goal is to design the entire property so the pool feels like it was always meant to be there.
When the complete outdoor environment is considered from the beginning, homeowners can make better decisions before construction starts and create a backyard that is more functional, comfortable, and visually connected.
Family Owned & Serving San Diego Since 2004
✔ Complete Outdoor Environment Planning
✔ 2D & 3D Landscape Design
✔ Poolside Hardscape, Planting & Lighting Design
✔ Licensed California C-27 Landscape Contractor
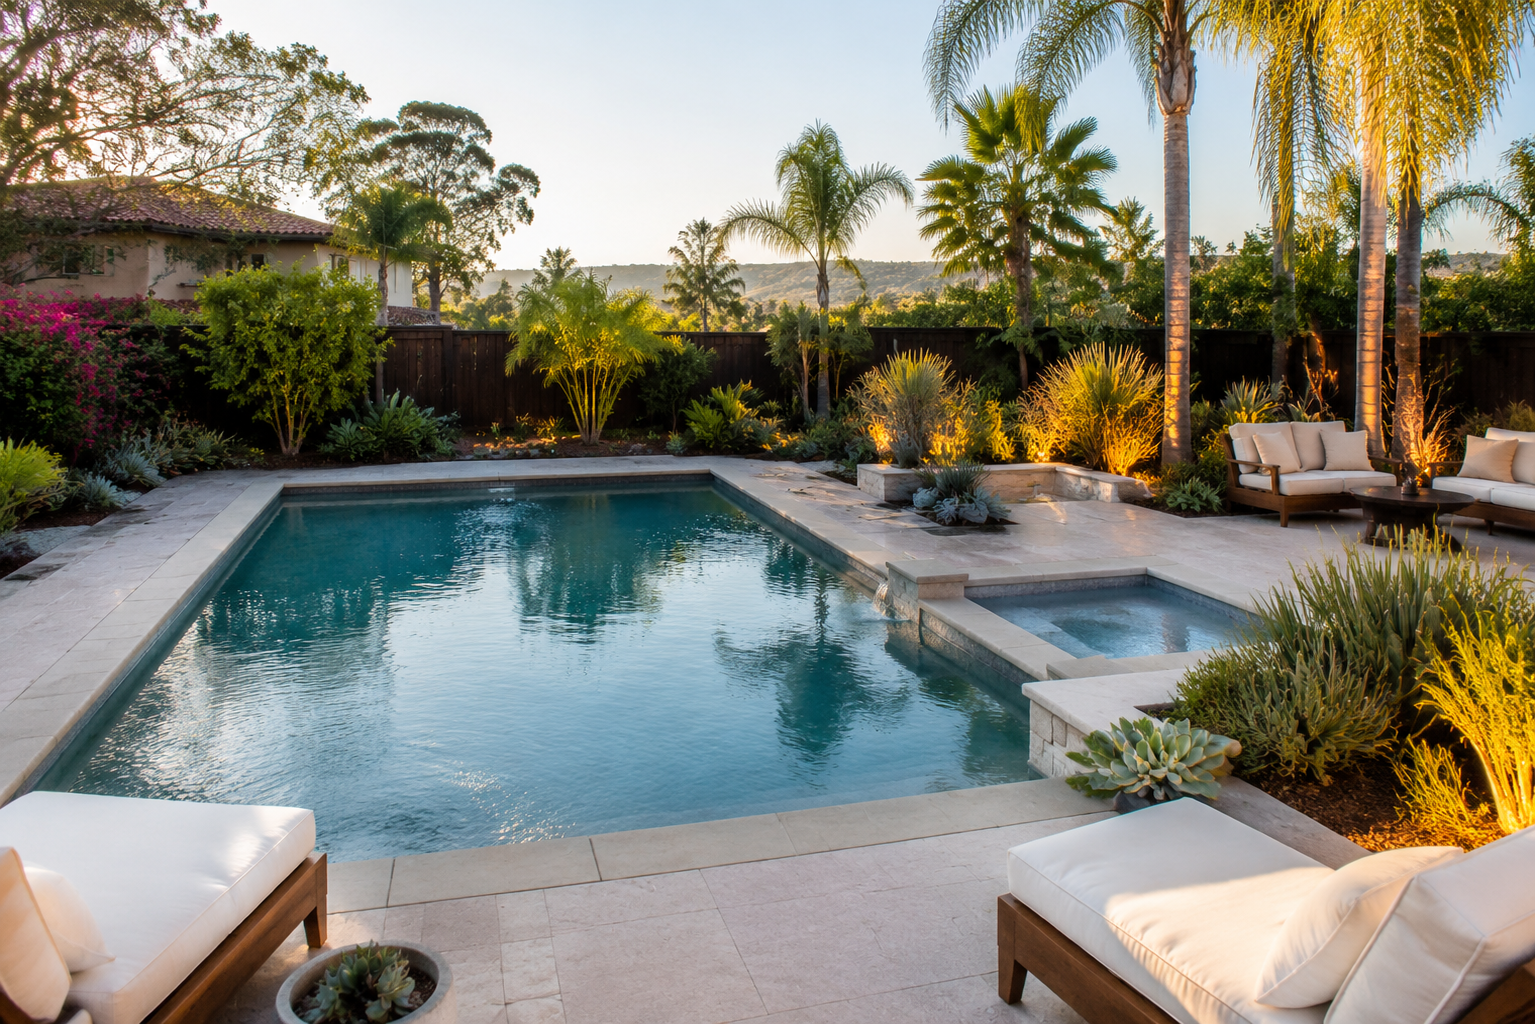
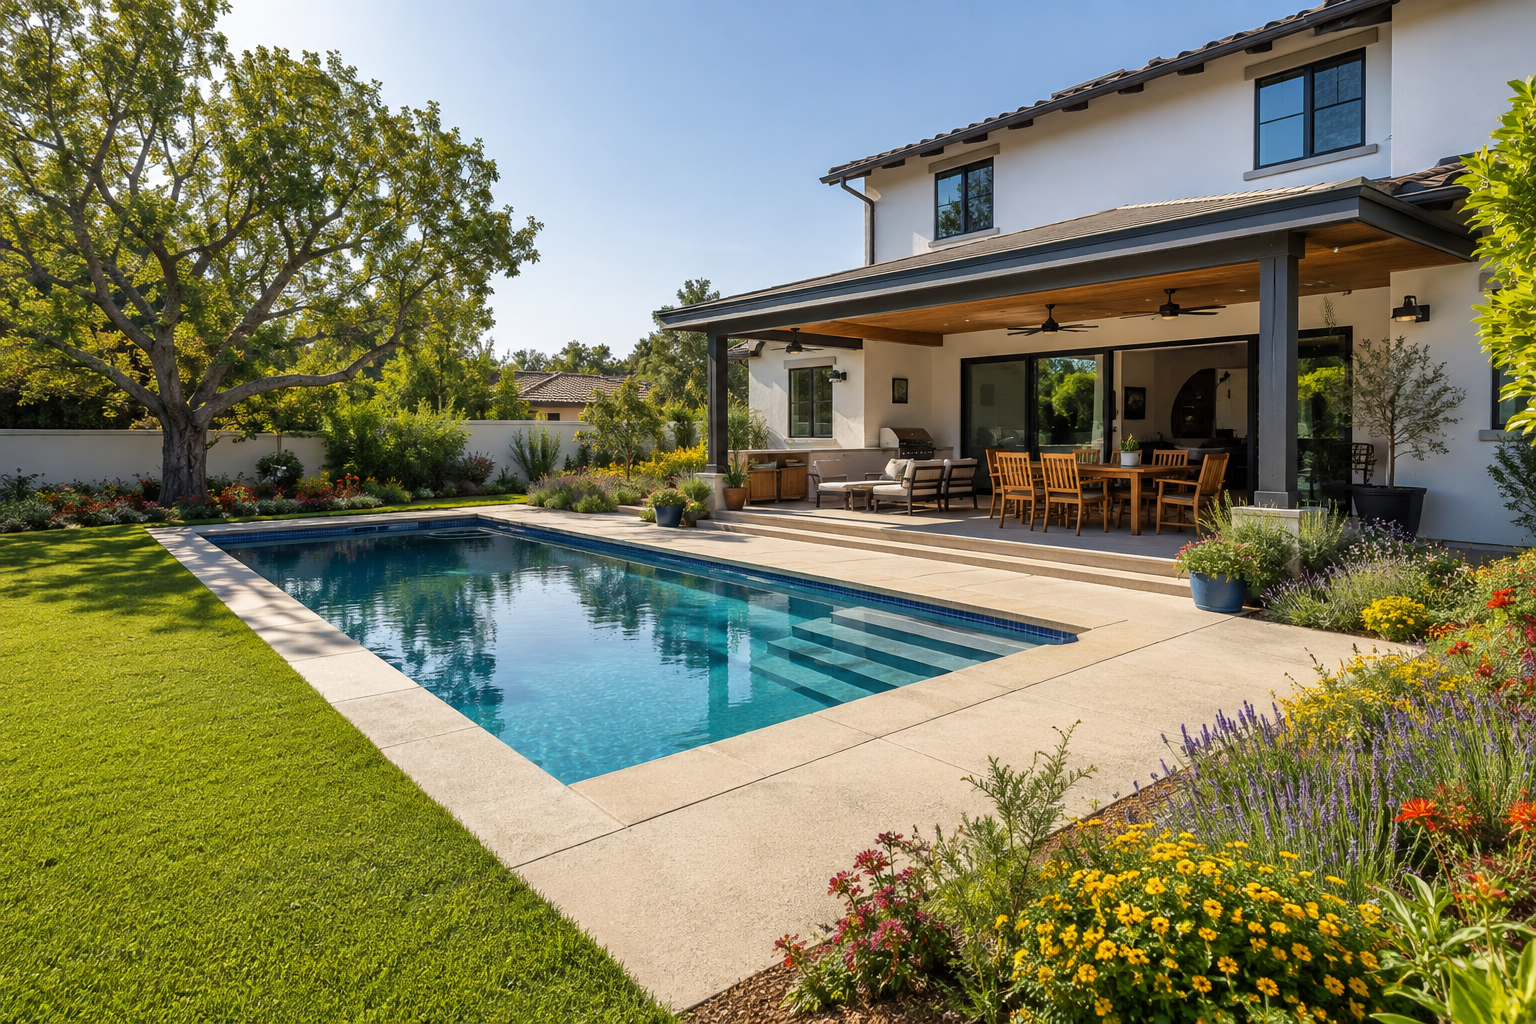
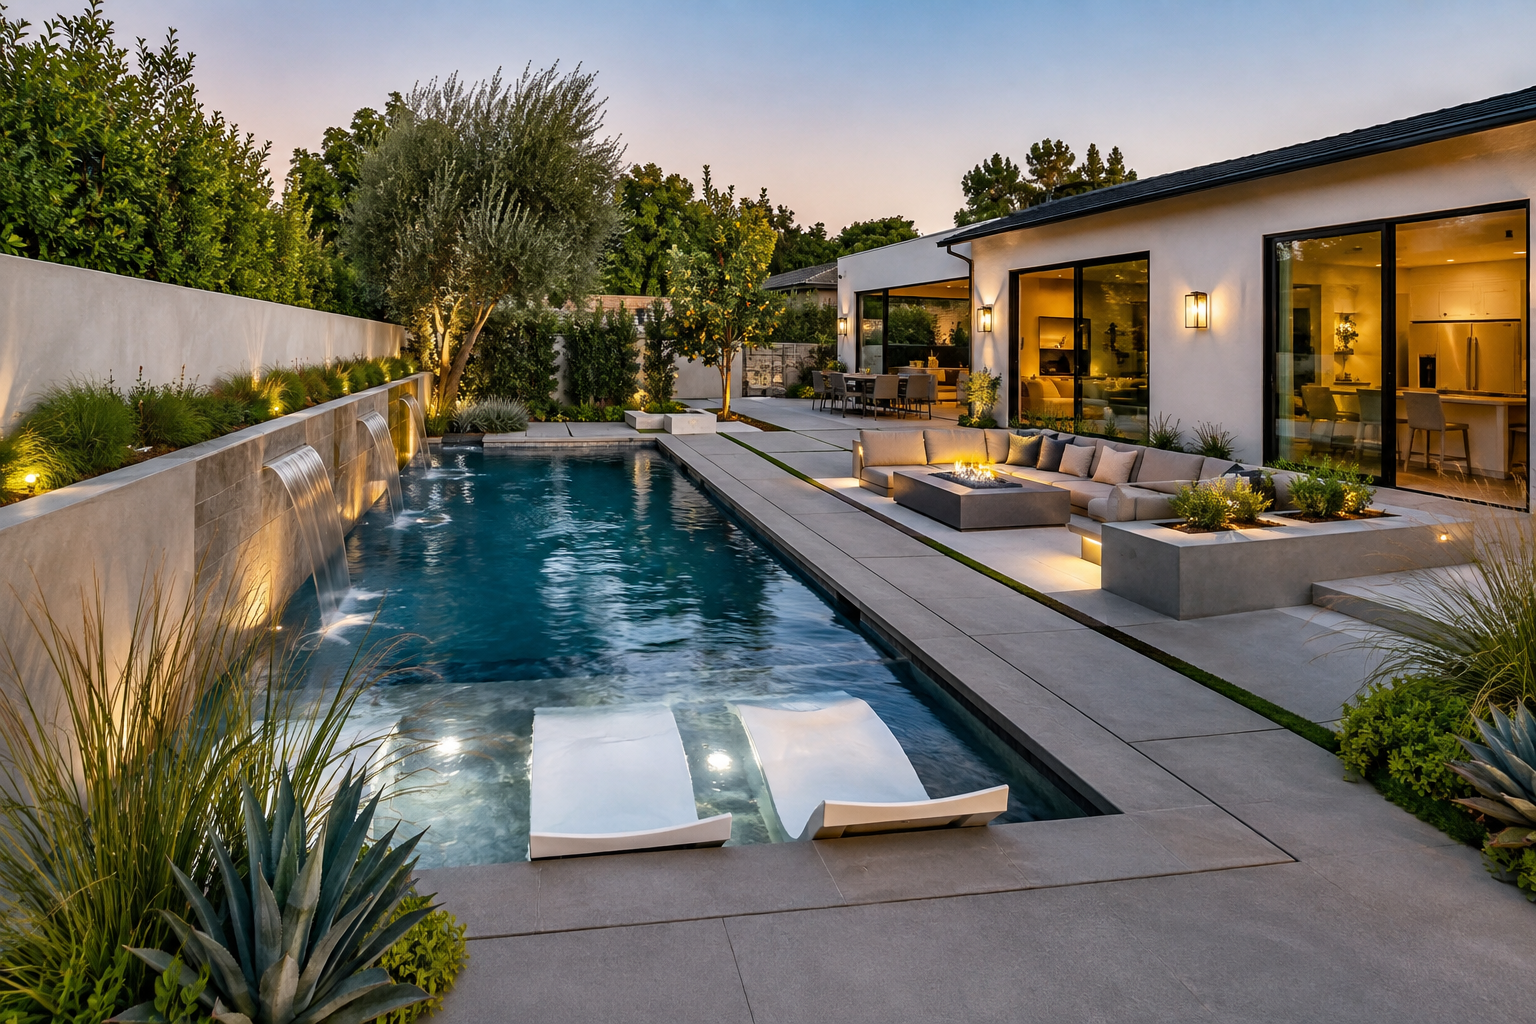
Designing the Pool and Landscape Together
One of the biggest mistakes in backyard planning is designing the swimming pool first and trying to fit everything else around it afterward.
A pool may occupy a large portion of the yard, but homeowners still need comfortable places to walk, sit, entertain, dine, cook, relax, and enjoy the landscape.
The relationship between the pool and the house is especially important. Doors, windows, patios, existing elevations, architectural lines, and important views can all influence where the pool should be positioned.
The surrounding hardscape also needs to be considered early. A properly planned Hardscape And Concrete Contractor scope may include pool decking, patios, walkways, steps, walls, transitions between materials, and other surfaces that connect the pool to the rest of the property.
Good design should also consider what happens after the sun goes down. Planning Landscape Low Voltage Lighting during the design phase allows pathways, steps, planting, walls, gathering spaces, and architectural features to be considered before construction is complete.
A well-planned pool environment should answer questions such as:
How will people move from the house to the pool?
Where will lounge chairs and outdoor furniture go?
Is there enough room to comfortably walk around the pool?
Where will guests gather?
Which areas receive the most sun?
Where is shade needed?
What views should be preserved?
What areas need more privacy?
How will water drain away from patios and structures?
Where will pool equipment be located?
How will equipment be screened without making service access difficult?
Where should trees and plants be placed?
How will the backyard look from inside the house?
Could an outdoor kitchen, pergola, fire feature, or other improvement be added later?
Thinking through these details before construction begins helps the pool, landscape, and outdoor living areas function as one connected design instead of a collection of separate projects.
The objective is simple: design the backyard first, and allow the pool and spa to become part of that larger vision.
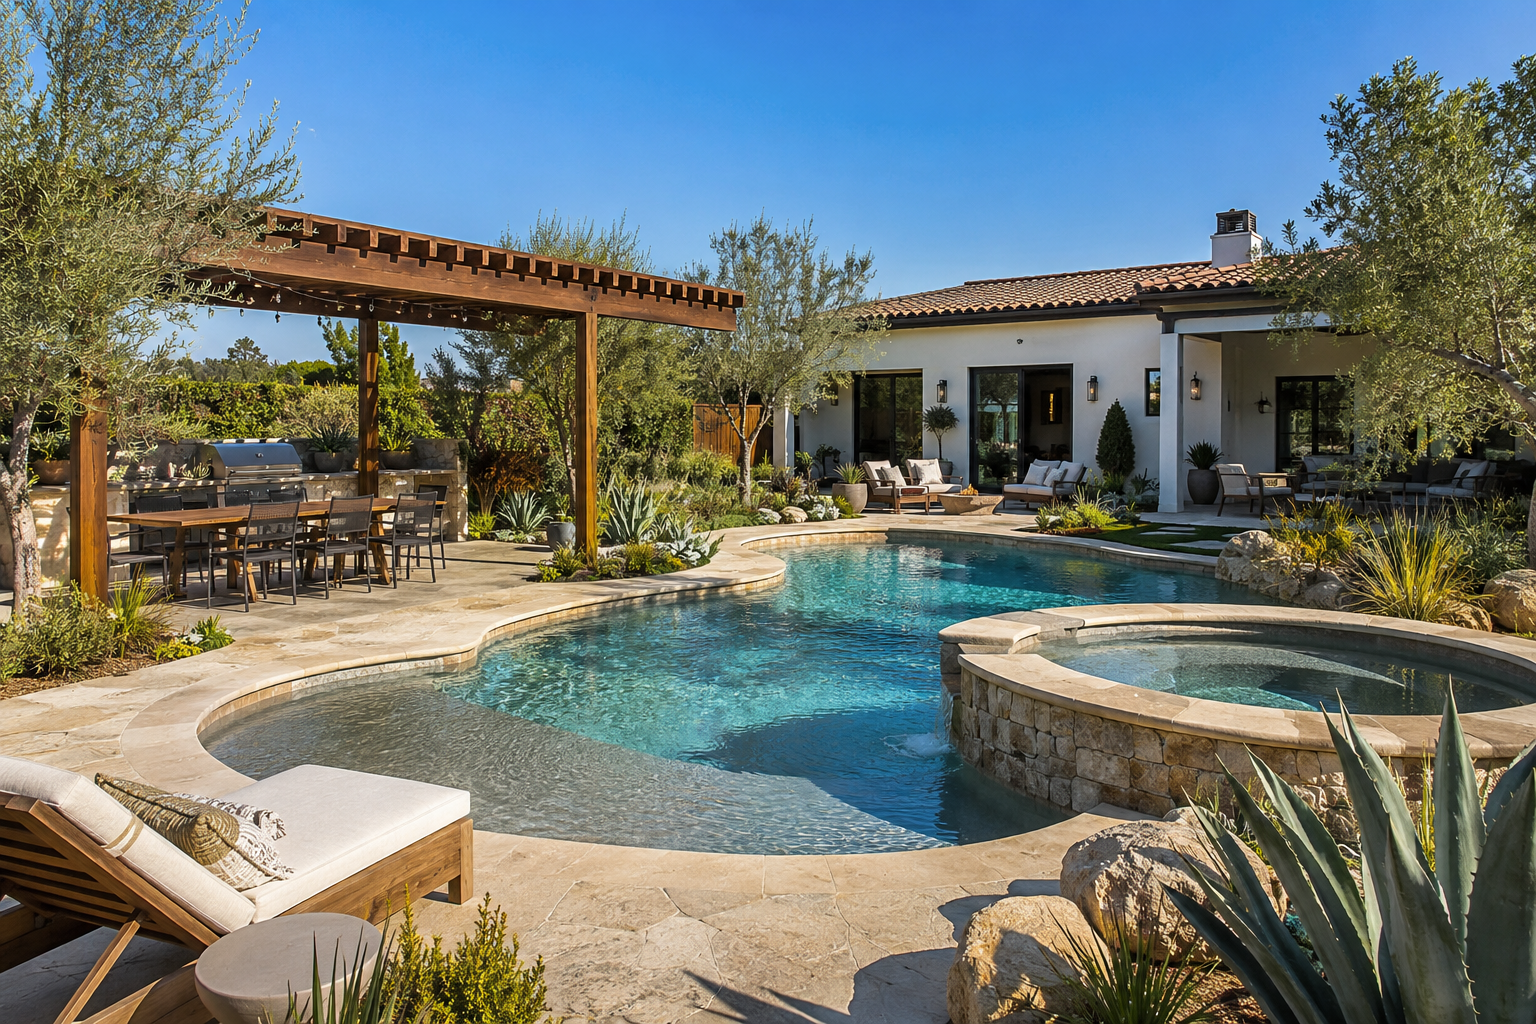
Choosing the Right Location for Your Pool & Spa
Where a pool is placed can have just as much impact on the finished backyard as the shape or style of the pool itself.
The best location is not automatically the center of the yard or the largest open area. Pool placement should be based on how the entire property functions, including the home, existing elevations, sunlight, views, privacy, access, drainage, utilities, and the outdoor spaces that will surround the pool.
Before establishing the final location, a professional design should consider:
Views from inside the home
How people enter and exit the backyard
Sun exposure throughout the day
Existing and proposed shade
Privacy from neighboring properties
Property elevations and slopes
Existing retaining walls
Drainage patterns
Underground and overhead utilities
Equipment location and service access
Construction access
Existing trees and mature landscaping
Patios and outdoor entertaining areas
Future landscape improvements
Applicable setbacks, easements, permits, and HOA requirements
One detail homeowners sometimes overlook is the view of the pool from inside the house. A pool is part of the landscape every day of the year, not only when someone is swimming.
Kitchen windows, family rooms, sliding doors, primary bedrooms, and other important viewpoints should be considered during the Landscape Design Process. Thoughtful placement can create a strong visual connection between the interior of the home and the outdoor environment.
Work With the Property's Elevations
San Diego properties are rarely identical. Some backyards are nearly flat, while others include slopes, raised foundations, lower patios, canyon edges, existing walls, or significant changes in elevation.
Those conditions should influence the design rather than being treated as problems after construction begins.
A change in grade may create opportunities for:
Raised spas
Vanishing-edge or raised-edge design concepts
Elevated patios
Seat walls
Terraced planting
Steps and landings
Raised planters
View-oriented entertaining areas
Properties with substantial elevation changes may also require properly designed Retaining Wall Contractor solutions to support surrounding landscape areas and create usable outdoor space.
The key is understanding the property before deciding what the pool should look like.
Think About Drainage Before Construction
Pool decks and patios introduce large areas of hard surface into the landscape. Once those surfaces are installed, rainwater, irrigation runoff, and water leaving the pool need somewhere appropriate to go.
That makes Drainage an important part of pool-area planning.
Finished grades should be carefully considered so water does not collect against the home, create standing-water areas, wash into planting beds, or continually drain back toward the swimming pool.
Planning drainage during the design phase is usually much easier than trying to correct drainage problems after the pool deck, patios, walls, and landscaping have already been installed.
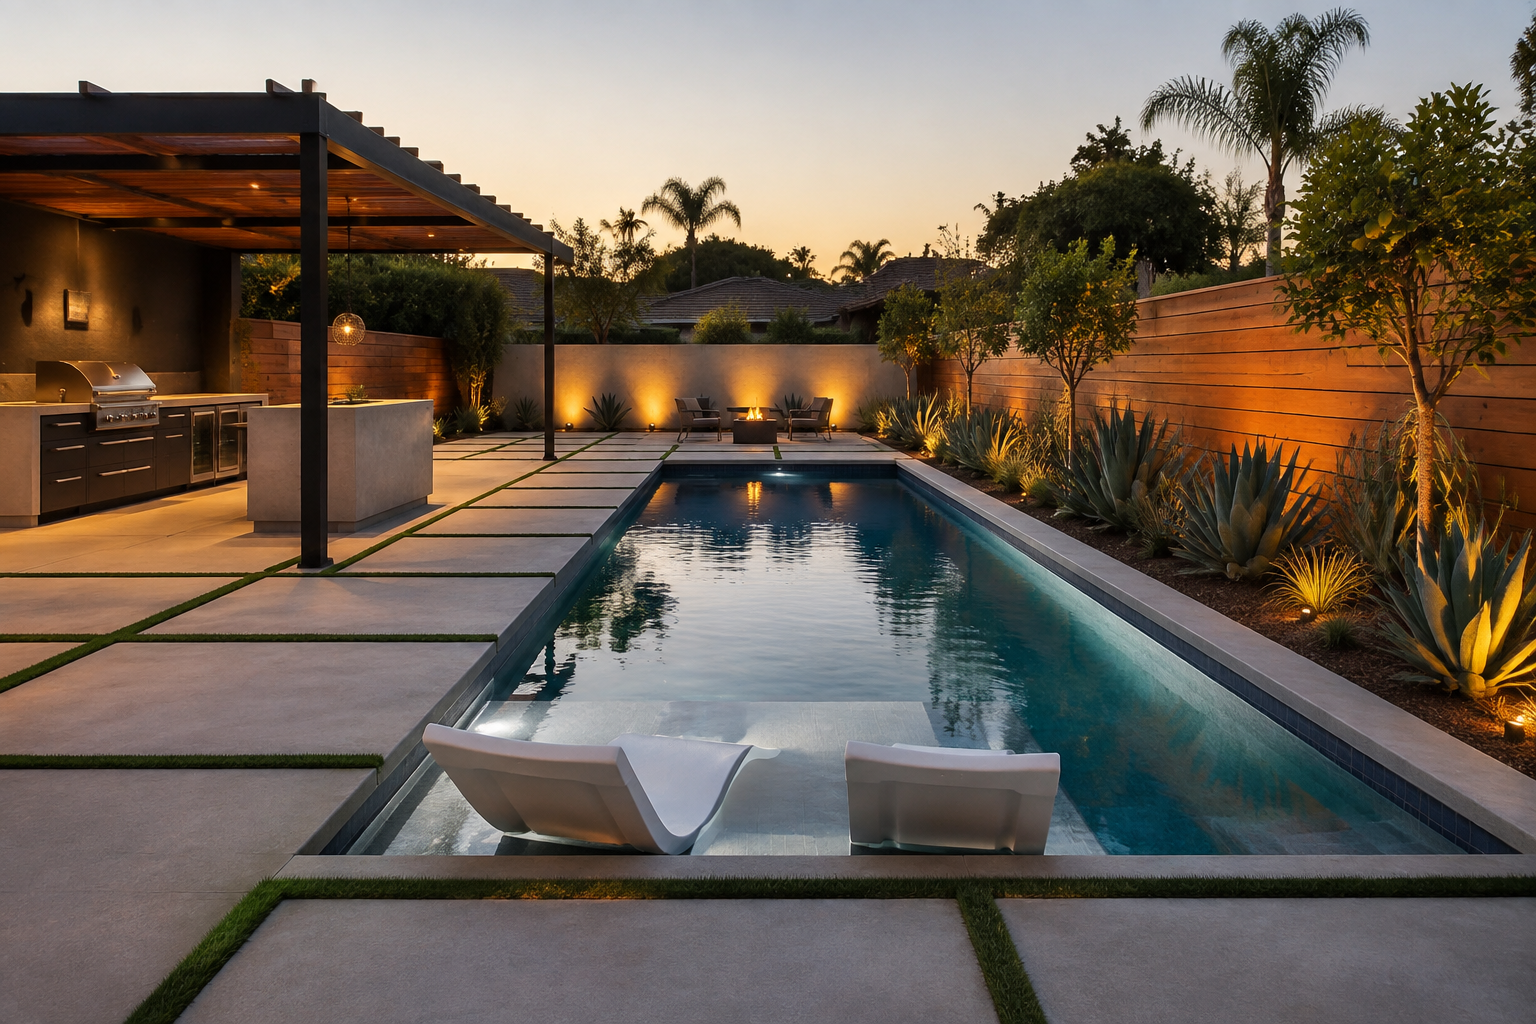
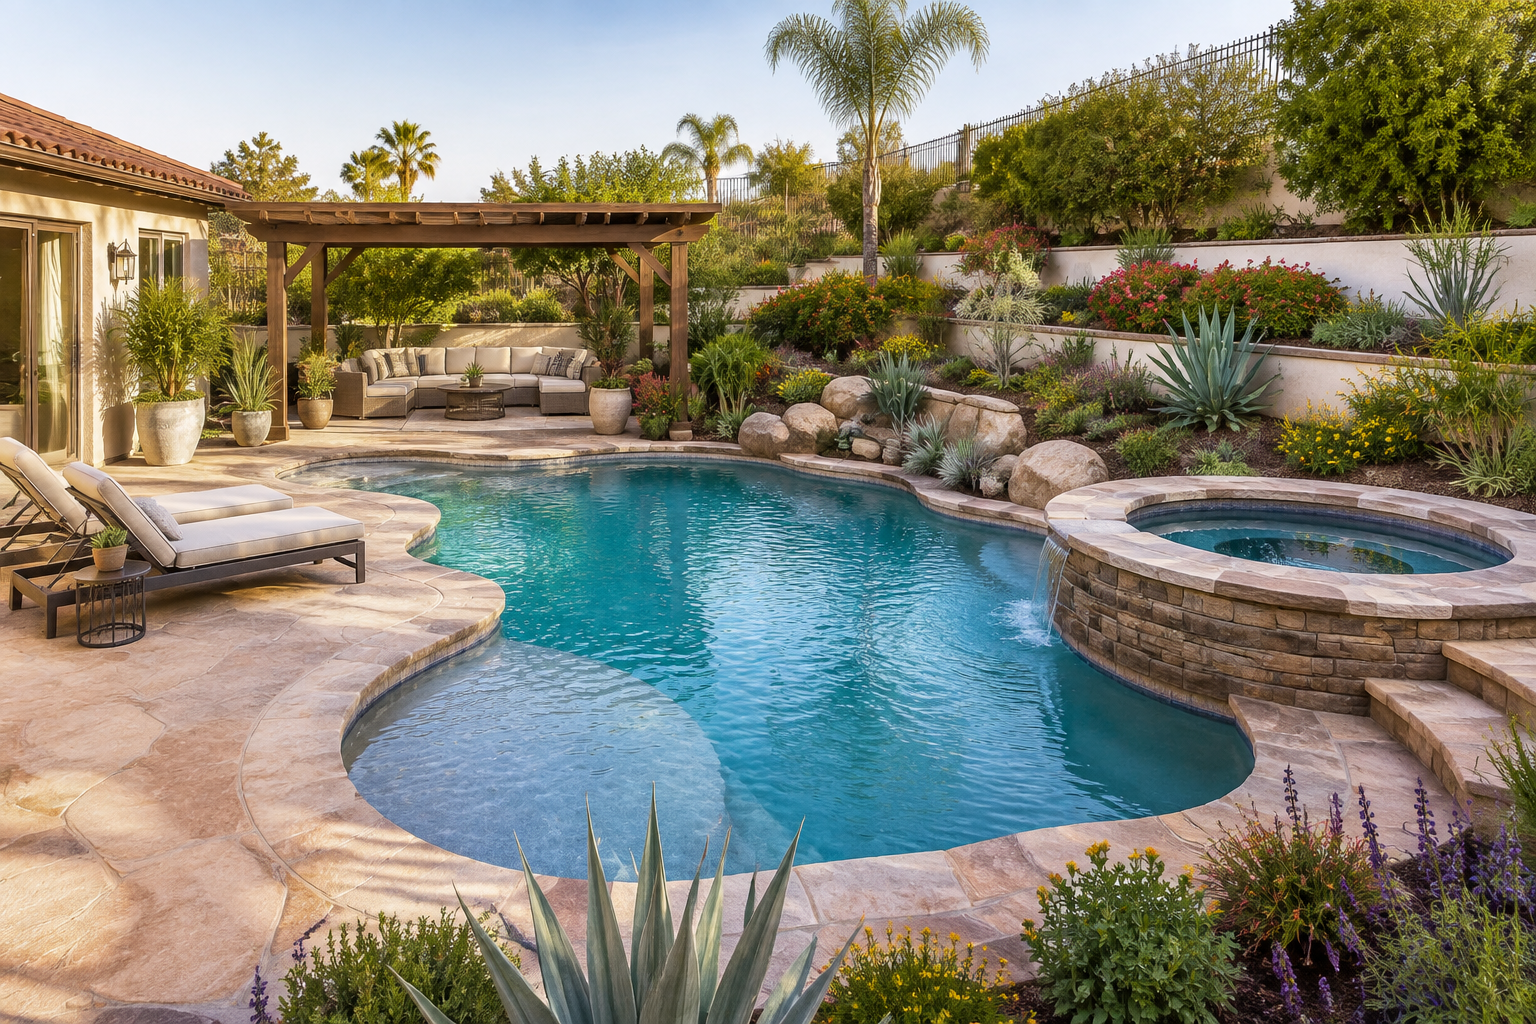
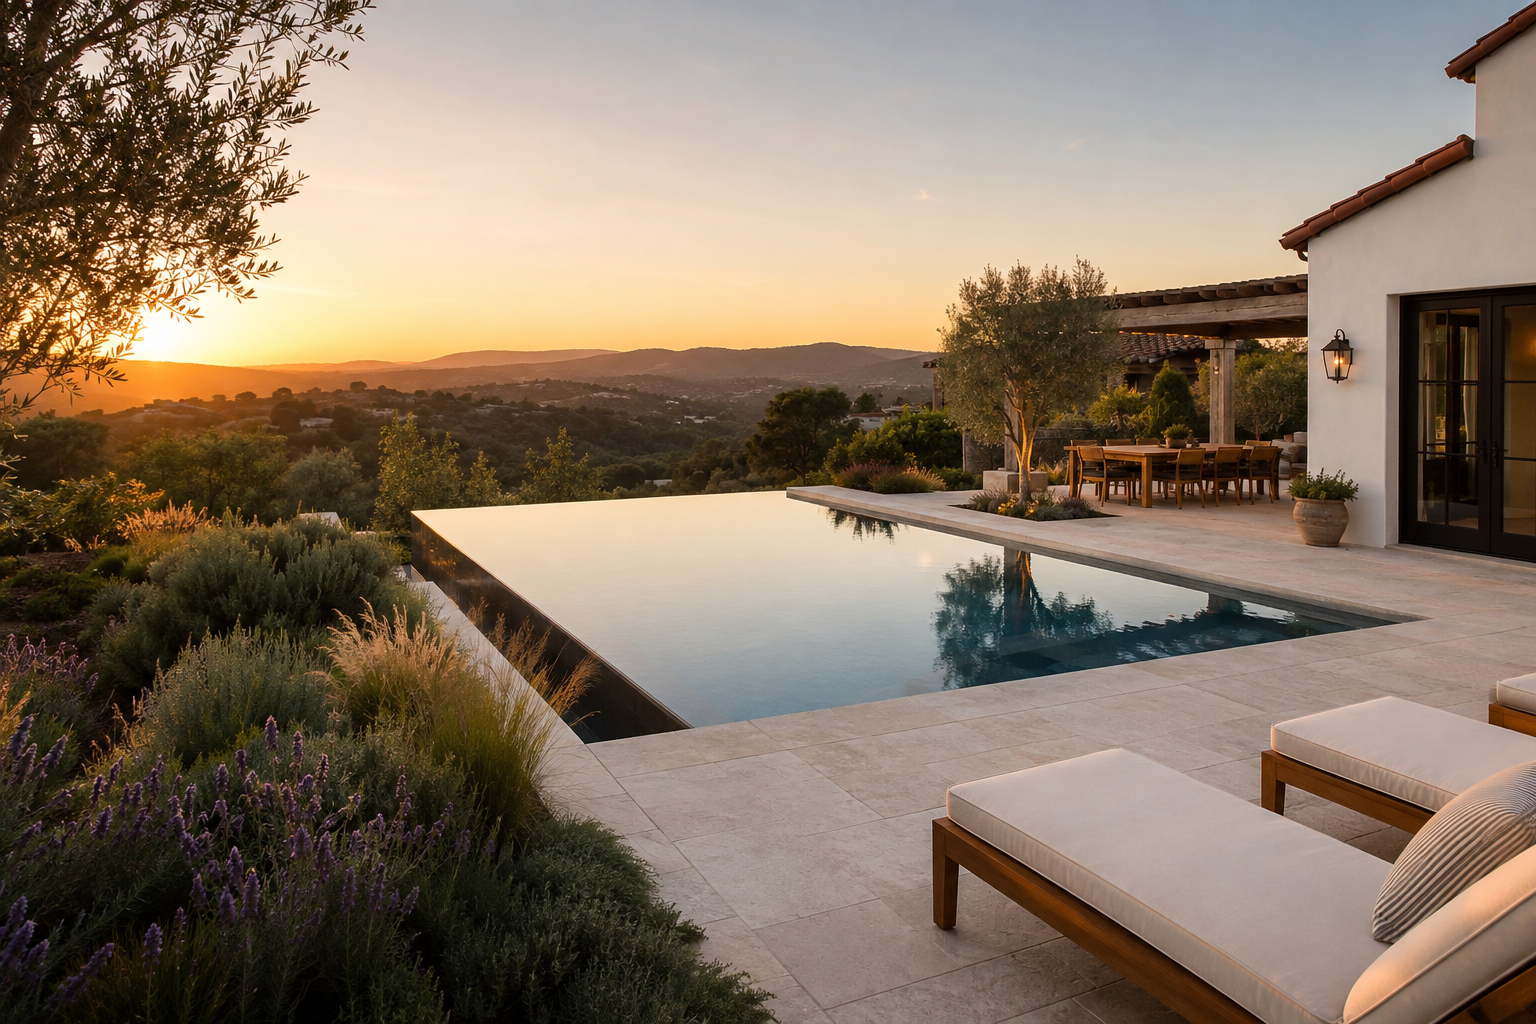
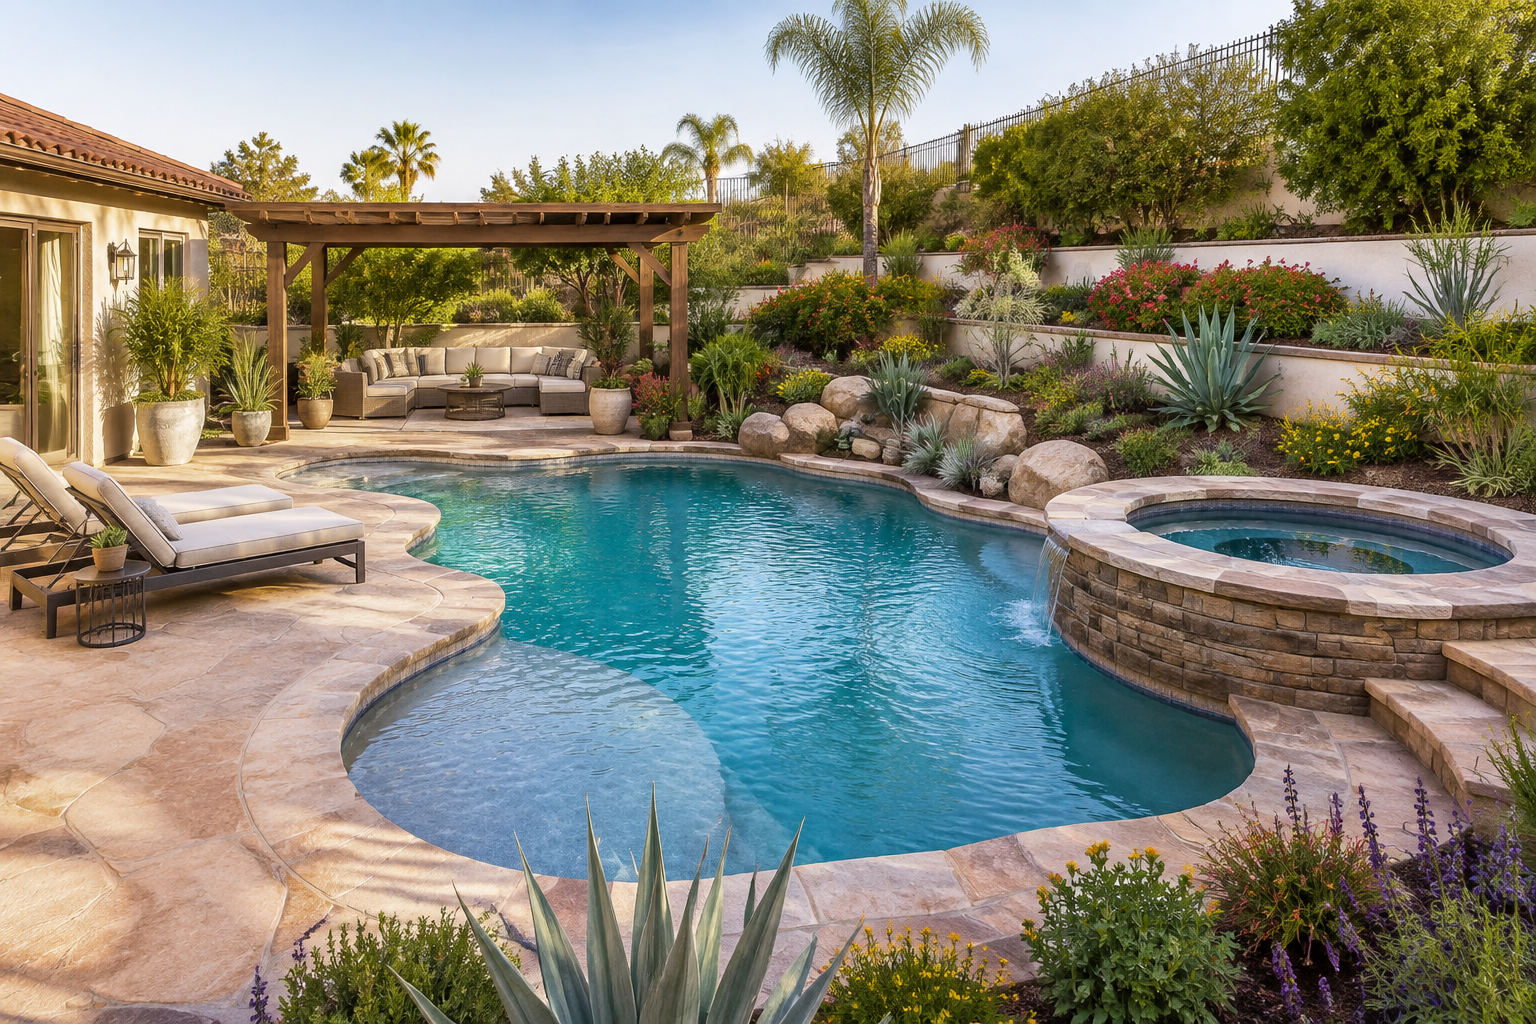
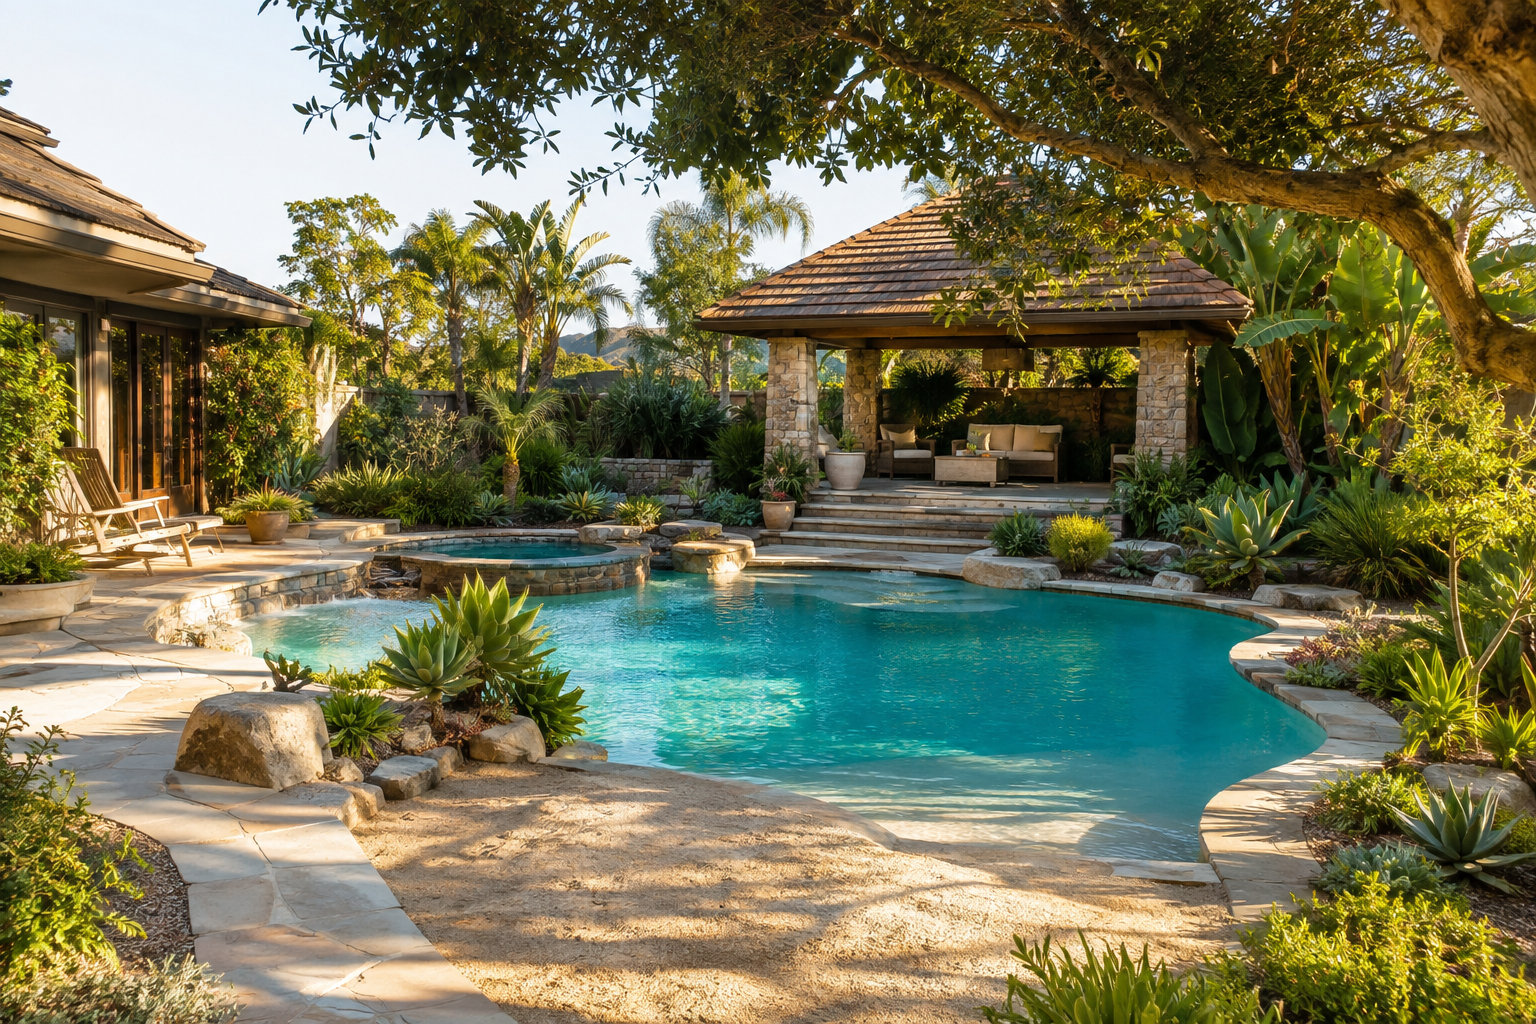
Pool Size, Shape & How Much Backyard Space You Really Need
A bigger pool does not automatically create a better backyard.
One of the most important parts of pool design is finding the right proportion between the pool and everything that surrounds it.
Homeowners need space not only for swimming, but also for walking, sitting, entertaining, landscaping, equipment access, and everyday outdoor living.
Before increasing the size of the pool, ask what activities need to happen around it.
For example:
Where will the lounge chairs go?
Is there room for an outdoor dining table?
Will there be an outdoor kitchen?
Is a fire feature planned?
Do you want lawn or artificial turf?
Is planting important?
Will children need an open play area?
Is a pergola or patio cover planned?
Will guests be able to comfortably circulate around the pool?
Is there enough room to service the pool and landscape?
Are future improvements being considered?
Sometimes reducing the pool dimensions slightly can dramatically improve the rest of the backyard.
Choose the Pool Shape Around the Property
Pool shape should respond to the architecture of the house and the overall landscape style rather than simply following a trend.
Geometric pools often complement contemporary, modern, mid-century, and more architectural landscapes. Straight edges can also coordinate naturally with patios, walls, structures, and other hardscape elements.
Freeform pools can work well in landscapes intended to feel softer, more natural, tropical, or informal.
Neither approach is automatically better. The important question is whether the shape fits the home and the surrounding landscape.
The surrounding Hardscape And Concrete Contractor design should also be developed alongside the pool. Pool decking, patios, walkways, steps, coping transitions, walls, and gathering areas need to work together visually and physically.
Design the Spa as Part of the Experience
The spa should not simply be added wherever space happens to remain.
Its location can affect:
Views across the backyard
Privacy
Access from the house
Connection to the pool
Seating and entertaining
Elevation changes
Visual focal points
Nighttime use
The overall appearance of the pool
A raised spa can become an architectural feature. An integrated spa can create a cleaner, quieter visual transition. A separate spa may create a more private destination within the landscape.
The right solution depends on the property and how the homeowners plan to use the space.
The objective is not to design the largest pool that will physically fit.
The objective is to create the right pool and spa for the property while preserving enough space to create a complete backyard around it.
Pool Decking, Coping & Hardscape Materials
The material surrounding a swimming pool has a major impact on how the entire backyard looks, feels, and performs.
Pool decking is not simply a decorative finish. It becomes one of the most heavily used surfaces in the landscape and needs to function around water, bare feet, furniture, changing temperatures, drainage, and regular outdoor use.
The right material should complement the architecture of the home while also being appropriate for the way the pool area will actually be used.
Common poolside hardscape materials include:
Concrete
Concrete pavers
Porcelain pavers
Natural stone
Travertine
Large-format paving materials
Combinations of multiple materials
Each has advantages and considerations.
Concrete Pool Decking
Concrete remains one of the most versatile materials for pool decks because it can be installed in many shapes and finished in different ways.
Depending on the design, homeowners may consider:
Broom-finished concrete
Sand-finished concrete
Colored concrete
Exposed aggregate
Decorative saw cuts
Large-format concrete patterns
Concrete can work especially well when the goal is to create a clean transition between the pool area and surrounding patios, walkways, steps, and other landscape features.
However, proper installation matters. Base preparation, reinforcement, drainage, control joints, expansion areas, and transitions to the pool structure all need to be considered before the concrete is placed.
Concrete Pavers
Concrete pavers offer another option for pool decks and outdoor living areas.
They are available in many sizes, textures, patterns, and architectural styles and can work well when homeowners want more visual detail than a traditional concrete surface.
Pavers can also make it easier to coordinate the pool deck with:
Patios
Walkways
Outdoor kitchens
Fire features
Steps
Courtyards
Other entertaining areas
The quality of the finished installation depends heavily on proper excavation, base preparation, compaction, edge restraint, drainage, and installation technique.
Porcelain Pavers
Outdoor porcelain has become an increasingly interesting option for contemporary landscapes.
Large-format porcelain can create a clean, architectural appearance and is available in finishes designed to resemble natural stone, concrete, and other materials.
Around a pool, however, homeowners should select porcelain specifically intended for exterior wet environments.
Important considerations include:
Appropriate exterior use
Wet-area slip resistance
Surface texture
Installation method
Proper drainage
Edge and coping details
Movement joints
Compatibility with the supporting surface
Porcelain should not be selected based on appearance alone. The product and installation system need to be appropriate for the application.
Natural Stone & Travertine
Natural stone can create a timeless pool environment and works particularly well with Mediterranean, Spanish, traditional, and organic landscape styles commonly found throughout San Diego.
Travertine is frequently considered for pool areas because of its distinctive natural appearance.
Other stone options may also be appropriate depending on the design.
Natural stone varies from one material to another, so homeowners should consider:
Surface texture
Heat exposure
Porosity
Sealing requirements
Maintenance
Color variation
Thickness
Installation method
Long-term exposure to pool water and outdoor conditions
Selecting stone should involve more than choosing a sample from a showroom. How the material performs outdoors should be part of the decision.
Pool Coping Is an Important Design Detail
Coping is the material installed along the top edge of the swimming pool.
Although it may appear to be a relatively small detail, coping creates the visual and physical transition between the pool structure and the surrounding deck.
Coping options may include:
Natural stone
Precast concrete
Poured or cantilevered concrete
Manufactured coping
Porcelain coping
Materials coordinated with the surrounding pavers
The coping should work with the pool finish, decking material, architecture of the home, and overall landscape design.
Its dimensions, edge profile, color, texture, and relationship to the surrounding deck can significantly affect the appearance of the finished pool.
This is why pool decking and coping should be coordinated as part of the overall Hardscape And Concrete Contractor planning rather than selected independently at the end of the project.
The goal is to create a transition that feels intentional from the water's edge all the way through the rest of the backyard.
Designing Pool Hardscape for Safety, Drainage & Long-Term Performance
Beautiful materials are important, but a pool deck also needs to perform.
Because pool areas are regularly exposed to water, several technical considerations should be addressed before materials are selected and installed.
Consider the Surface When It Is Wet
A material that feels appropriate when dry may perform differently once water is introduced.
Pool decks are walked on with wet feet, and water can regularly splash beyond the edge of the pool.
For that reason, surface texture and wet-area performance should be considered when evaluating materials.
Highly polished or overly smooth surfaces may not be appropriate for every pool application.
When considering porcelain, stone, concrete, or manufactured pavers, homeowners should confirm that the specific product and finish are intended for the proposed exterior wet environment.
Consider Surface Temperature
San Diego receives substantial sunshine, and pool decking may be exposed to direct sunlight for much of the day.
Different materials, finishes, and colors can absorb and retain heat differently.
This is particularly important in areas where people will regularly walk barefoot.
Material samples should ideally be evaluated in actual outdoor conditions whenever possible rather than judging color and texture exclusively indoors.
Drainage Needs to Be Designed Into the Deck
Water should not simply be expected to find its own way out of a pool area.
The deck, surrounding patios, planting areas, walls, and existing property grades need to work together so surface water is directed appropriately.
Poor drainage can contribute to:
Standing water
Water collecting against structures
Soil erosion
Water entering planting areas in unwanted locations
Staining
Premature deterioration of surrounding materials
Uncomfortable wet areas around the pool
Drain locations, finished elevations, slopes, and transitions between surfaces should therefore be established during design—not after the hardscape has already been installed.
Movement Between Materials Needs to Be Considered
Outdoor materials expand, contract, and move.
Concrete slabs can develop cracks. Separate structures can move differently from one another. Changes in temperature can also cause materials to expand and contract.
These conditions become particularly important when large-format porcelain, tile, stone, or other rigid finish materials are installed around a pool.
Proper installation may require movement joints, expansion areas, crack-isolation or uncoupling systems, and other installation details appropriate to the selected material and substrate.
Control or movement joints should not simply be covered because they interfere with the desired paving pattern.
The finished design needs to respect how the underlying construction will move over time.
Think Beyond the Pool Deck
The most successful pool projects create visual continuity throughout the property.
A pool deck might transition into:
An outdoor kitchen
A dining patio
A fire feature
A pergola
A lawn
Artificial turf
Garden areas
Steps
Retaining walls
Side-yard access
Walkways leading back to the house
Those transitions should be designed intentionally.
Using too many unrelated materials can make a backyard feel fragmented. Using materials strategically—sometimes repeating the same paving or coordinating complementary materials—can make the entire property feel larger, cleaner, and more connected.
The best pool-deck material is therefore not simply the material that looks best by itself.
It is the material that looks right, performs correctly, and works with the complete landscape around it.
Poolside Planting & Landscape Design
The planting around a swimming pool can completely change the character of the backyard.
Plants can soften large areas of hardscape, create privacy, frame views, provide shade, introduce color and movement, and help the pool feel connected to the rest of the landscape.
But poolside planting requires more thought than simply choosing plants that look good.
The plants need to work with the available space, climate, sunlight, irrigation, pool equipment, surrounding hardscape, and long-term maintenance expectations.
A thoughtful Landscape Design Process should consider how every plant will perform as it matures—not just how it looks when it is first installed.
Choose Plants for Their Mature Size
One of the most common landscape mistakes is planting based on the size of the plant at the nursery.
A small tree or shrub may eventually become much larger than expected.
Around a swimming pool, mature size is especially important because plants may eventually interfere with:
Pool decking
Walkways
Views
Lighting
Outdoor furniture
Pool equipment
Fences and walls
Neighboring properties
Structures
Underground utilities
Trees and large shrubs should be given enough room for both their canopy and root systems to develop without creating unnecessary conflicts with surrounding improvements.
Think About Roots Before Planting
Roots need space.
Large trees planted too close to patios, walls, pool decking, plumbing, or other improvements may eventually create conflicts as the landscape matures.
That does not mean trees should be avoided around pools. Trees can provide valuable shade, scale, privacy, and structure.
The important part is selecting appropriate species and locating them far enough away from improvements to accommodate their mature growth.
Reduce Excessive Plant Debris Around the Pool
Every landscape produces some natural debris, but certain plants can create considerably more cleanup around a swimming pool.
Before selecting plants close to the water, consider how much they may produce:
Leaves
Flowers
Fruit
Seed pods
Bark
Thorns
Fine plant debris
A beautiful flowering tree located directly over the pool may look spectacular for part of the year while creating significant cleanup during another season.
Plant placement should balance appearance with maintenance.
Lower-litter plants can be particularly useful immediately adjacent to the pool, while plants that produce more seasonal debris may be better positioned farther away.
Consider Pool Water and Splash Zones
Pool water can occasionally reach nearby planting areas through splashing, wet swimmers, cleaning, or maintenance.
Plants located immediately adjacent to the pool should therefore be selected with those conditions in mind.
Repeated exposure to water containing salts or pool-treatment chemicals can affect sensitive plants.
Providing some separation between the water's edge and more sensitive planting can help protect the landscape while also making maintenance easier.
Consider Heat Reflected From Hardscape
Pool areas often contain substantial amounts of paving.
Concrete, stone, porcelain, walls, and other hard surfaces can create hotter conditions than the same plant might experience in an open planting bed.
Plant selection should account for:
Direct afternoon sun
Reflected heat
South- and west-facing walls
Limited soil volume
Wind exposure
Coastal conditions
Inland heat
A plant that performs beautifully in coastal La Jolla may behave differently in a hotter inland backyard.
The landscape should be designed for the actual conditions of the property.
Keep Irrigation Separate From the Pool
Poolside planting still requires proper irrigation.
Planting areas should be designed so water reaches the roots without unnecessarily spraying patios, windows, furniture, walls, or the swimming pool itself.
Drip irrigation is often well suited to shrubs, trees, ornamental grasses, and planting beds because water can be delivered directly into the soil.
The irrigation system should also be accessible for future maintenance and adjustments as plants mature.
Use Planting to Frame the Pool
Not every plant needs to be positioned immediately against the pool deck.
Sometimes the most effective planting is farther away.
Trees and shrubs can be positioned to:
Frame important views
Create visual depth
Screen neighboring structures
Soften walls
Highlight architectural features
Create a backdrop behind the pool
Draw attention toward a focal point
The objective is to make the pool feel like part of a garden rather than an isolated body of water surrounded entirely by hardscape.
Privacy, Screening & Views Around a Pool
Privacy can dramatically affect how comfortable a pool and spa area feels.
A backyard may look beautiful, but if swimmers feel exposed to neighboring windows, second-story balconies, streets, or adjacent properties, the space may never feel completely relaxing.
Privacy should therefore be considered early in the design.
The first step is identifying exactly where privacy is needed.
Stand in the areas where people will actually spend time:
Inside the pool
Sitting in the spa
Relaxing on lounge chairs
Dining outdoors
Using an outdoor kitchen
Sitting around a fire feature
Looking through doors and windows from inside the home
Then determine where the unwanted views originate.
Privacy Does Not Always Require a Solid Wall
There are several ways to create screening around a pool.
Depending on the property, solutions may include:
Trees
Evergreen shrubs
Hedges
Layered planting
Decorative fencing
Solid fencing
Masonry walls
Privacy screens
Trellises
Pergolas
Raised planters
Combinations of planting and structures
A professionally planned Fencing Contractor In San Diego solution can help define property boundaries and provide privacy while coordinating with the architecture and landscape.
However, privacy fencing should also be coordinated with applicable pool-safety requirements. A decorative privacy screen and a required swimming-pool safety barrier are not automatically the same thing.
Screen the View Without Closing In the Backyard
More privacy is not always better.
Installing a tall solid wall or dense hedge around every side of a smaller backyard can make the property feel confined.
A better approach is often selective screening.
Block the views that need to be blocked while preserving:
Open sky
Distant hills
Canyon views
Mature trees
Architectural focal points
Attractive neighboring vegetation
Important sightlines from the home
Sometimes a strategically positioned tree or group of shrubs can solve a privacy problem without constructing a large wall.
Consider Second-Story Views
Second-story windows are one of the more difficult privacy challenges around swimming pools.
A standard fence may block views at ground level while doing very little to screen a second-story window.
Possible solutions can include:
Strategically placed trees
Taller screening shrubs
Layered planting
Pergolas
Overhead structures
Trellises
Carefully positioned architectural screens
The correct solution depends on viewing angles.
This is another reason site analysis is important. Privacy should be evaluated three-dimensionally rather than simply drawing a hedge along the property line.
Use Layers Instead of One Continuous Hedge
Layered planting can often create a more natural appearance than a single row of identical shrubs.
A privacy composition might combine:
Taller screening trees
Medium evergreen shrubs
Lower flowering plants
Ornamental grasses
Accent plants
Groundcovers
This creates depth while preventing the landscape from looking like a solid green wall.
Layering can also provide seasonal interest and make a relatively narrow planting area appear deeper.
Remember That Plants Grow
Plant screens take time to mature.
Installing plants too close together to create instant privacy can lead to overcrowding, poor airflow, maintenance problems, and an unhealthy landscape several years later.
The better approach is to plan for mature plant size and decide whether additional temporary screening is needed while the landscape establishes.
Protect the Views Worth Keeping
Privacy design should not only ask, “What do we want to hide?”
It should also ask, “What do we want to see?”
A well-designed pool landscape can intentionally frame:
A sunset
A canyon
A mountain
A specimen tree
A garden
A fire feature
A water feature
An architectural element
The pool itself
The best privacy design removes unwanted views while strengthening the views that make the property special.
The result should feel private without feeling enclosed.
Pool & Spa Landscape Lighting
A pool and spa can look completely different after sunset.
Thoughtful outdoor lighting does more than make the backyard visible at night. It can improve circulation, define entertaining areas, highlight planting and architectural features, create depth, and give the entire pool environment a more finished appearance.
The key is to design the lighting as part of the landscape from the beginning rather than adding fixtures wherever darkness remains after construction.
A professionally planned Landscape Low Voltage Lighting system can help coordinate the areas surrounding the pool while creating layers of light throughout the rest of the property.
Think in Layers Rather Than Lighting Everything Equally
One of the biggest mistakes in outdoor lighting is trying to make the entire backyard equally bright.
A well-designed landscape normally uses different levels and types of light to create contrast.
Around a pool, lighting may be used to:
Define walkways
Illuminate steps and elevation changes
Highlight specimen trees
Accent architectural walls
Illuminate planting
Define outdoor dining areas
Light an outdoor kitchen
Highlight a fire feature
Provide subtle light around seating areas
Create visual depth beyond the pool
Improve the view from inside the home
Some areas need functional light while others may only need enough illumination to create atmosphere.
The objective is not to turn the backyard into a brightly lit commercial space.
The objective is to create a comfortable environment where people can safely move through the landscape while still enjoying the dramatic effect of the pool and garden at night.
Light the Destination and the Path to It
A beautiful pool area does little good if the route from the house to the pool is difficult to navigate after dark.
Lighting design should consider how people move throughout the property.
Important areas may include:
Doors leading from the house
Walkways
Steps
Changes in elevation
Side-yard access
Outdoor kitchens
Dining patios
Fire features
Spa access
Gates
Equipment-access areas
Lighting these transitions can make the entire outdoor environment more comfortable and easier to use.
Use Planting to Create Nighttime Depth
During the day, plants provide color, texture, movement, privacy, and shade.
At night, lighting can reveal an entirely different layer of the landscape.
Uplighting a mature tree can create a dramatic backdrop behind the pool. Softly illuminating ornamental grasses can emphasize movement. Lighting a textured wall or specimen plant can create a focal point that is visible from both the backyard and inside the home.
This becomes especially valuable when the pool is positioned outside major windows or glass doors.
Instead of looking into darkness after sunset, homeowners can continue enjoying the landscape from inside the house.
Avoid Excessive Glare
More fixtures do not automatically create better lighting.
Poorly positioned fixtures can shine directly into someone's eyes while they are sitting, swimming, walking, or looking across the backyard.
Fixture placement should consider:
Seating positions
Spa locations
Views from inside the house
Neighboring properties
Walkways
Reflective surfaces
Glass doors and windows
A fixture should generally illuminate the intended feature rather than becoming the feature itself.
The most successful landscape lighting often feels natural because the homeowner experiences the effect of the light without constantly noticing the source.
Coordinate Landscape Lighting With Pool Lighting
The lighting installed within the swimming pool and spa and the low-voltage lighting installed throughout the surrounding landscape serve different purposes.
They should still be visually coordinated.
The pool may provide a strong source of light after dark, so the surrounding landscape does not necessarily need to compete with it.
Instead, landscape lighting can extend the visual experience beyond the water by illuminating trees, walls, planting, walkways, structures, and gathering areas.
Pool and spa electrical systems have specialized installation and safety requirements and should be handled by the appropriately licensed professionals responsible for that portion of the project.
The landscape lighting plan should then complement those systems without confusing the two scopes of work.
Plan Wiring Before the Hardscape Is Finished
Lighting is much easier to integrate when it is considered before patios, walkways, walls, and other hardscape features are completed.
Planning ahead may allow sleeves and pathways for wiring to be incorporated beneath future hardscape rather than requiring finished surfaces to be disturbed later.
It also provides an opportunity to think about future lighting.
Even if every fixture is not installed during the first phase, providing access for future improvements can make later expansion considerably easier.
The best lighting plan should consider how the backyard will look not only on the day construction is finished, but also several years later as plants mature and the landscape develops.
Outdoor Kitchens, Fire Features & Entertaining Around the Pool
For many homeowners, the pool is only one part of the backyard.
The real goal is creating a place where family and friends can spend time together.
That may include swimming during the day, cooking outdoors in the afternoon, gathering around a dining table in the evening, and relaxing near a fire feature after sunset.
These activities should be considered together during the design process.
A professionally planned Outdoor Kitchen And Fire Features Contractor scope can help integrate cooking, dining, fire features, seating, and surrounding hardscape into the overall pool environment rather than treating each feature as a separate addition.
Plan the Outdoor Kitchen Around How You Entertain
An outdoor kitchen can be as simple as a built-in grill and counter or as detailed as a complete outdoor cooking area.
Possible features may include:
Built-in barbecue grills
Counter space
Bar seating
Refrigeration
Sinks
Storage
Trash and recycling
Side burners
Pizza ovens
Beverage centers
Serving areas
Outdoor dining
Before choosing appliances, think about how people will actually use the space.
A homeowner who primarily grills for the immediate family may need something very different from someone who regularly entertains large groups.
The location should also make sense.
An outdoor kitchen positioned too far from the house may require people to repeatedly carry food and supplies across the yard.
Placed too close to the pool, however, it could interfere with circulation, lounge furniture, or the open space needed around the water.
The kitchen should feel connected to both the house and the pool without becoming an obstacle between them.
Create Enough Room Around Gathering Areas
Outdoor furniture requires more room than many homeowners expect.
It is not enough to measure the table, bar, sofa, or lounge chair itself.
People need room to:
Pull chairs out
Walk behind seated guests
Carry food
Move between the pool and dining area
Open appliance doors
Access storage
Move safely around counters
Enter and exit the space comfortably
These circulation areas should be included in the plan before patios and structures are built.
A beautifully designed outdoor kitchen can become frustrating if people are constantly squeezing between furniture, counters, and the swimming pool.
Use Fire Features to Create a Separate Destination
A fire feature can create a completely different experience within the same backyard.
Instead of placing every activity directly beside the pool, the fire area can become another destination.
Depending on the design, homeowners may consider:
Fire pits
Fireplaces
Linear fire features
Fire bowls
Built-in seating around fire features
Fire and water combinations
The fire feature can become an evening gathering space while allowing the pool to remain visually connected in the background.
Placement is important.
The design should consider surrounding structures, combustible materials, planting, furniture, circulation, prevailing conditions, manufacturer requirements, and applicable fire and building requirements.
Fire features should never be positioned solely because a location looks attractive on a drawing.
They need enough surrounding space to function safely and comfortably.
Think Carefully About Fire and Planting
Planting can soften a fire-feature area, but combustible vegetation and accumulated plant debris require careful consideration.
Trees, shrubs, ornamental grasses, mulch, structures, and furniture should all be evaluated when determining where a fire feature belongs.
This is particularly important in San Diego communities affected by wildfire concerns.
The City of San Diego's current defensible-space guidance emphasizes reducing combustible materials close to structures and maintaining vegetation appropriately in fire-prone areas.
The landscape design should therefore coordinate the fire feature with both the entertaining plan and the property's fire-safety conditions.
Shade Should Be Part of the Pool Plan
San Diego homeowners may spend many hours outside around a swimming pool.
That makes shade an important part of the overall design.
Depending on the property, shade can come from:
Existing trees
New shade trees
Pergolas
Patio covers
Umbrellas
Architectural structures
Shade should be positioned based on how the backyard is used throughout the day.
A dining area may benefit from afternoon shade. Lounge areas may need both sunny and shaded options. An outdoor kitchen can become uncomfortable if the cook is exposed to direct afternoon sun for several hours.
The goal is not necessarily to shade the entire pool deck.
The goal is to provide choices.
Keep the Pool as Part of the Experience
Outdoor kitchens, fire features, pergolas, dining areas, and seating should not compete with the pool.
They should help organize the backyard around it.
A well-designed outdoor environment may allow someone cooking at the barbecue to see the pool, guests sitting around a fire feature to remain connected to the rest of the group, and parents sitting at a dining table to maintain useful sightlines across the backyard.
This is where complete landscape planning becomes especially valuable.
Rather than asking where each individual feature will fit, the design asks a larger question:
How should all of these spaces work together?
When the answer is established before construction begins, the finished backyard can feel like one cohesive outdoor environment rather than several unrelated projects placed next to each other.
Pool Equipment, Utilities & Service Access
Pool equipment is rarely the most exciting part of a backyard design, but where it is placed can have a major impact on how well the finished space functions.
Pumps, filters, heaters, automation equipment, plumbing, electrical components, and other pool systems need an appropriate location that provides service access without becoming a visual distraction.
The equipment area should be considered during the initial Landscape Design Process rather than finding a leftover corner after the pool and patios have already been designed.
Think About Equipment Location Early
A good equipment location should balance several considerations:
Access for future maintenance
Appropriate space around equipment
Connection to the pool
Utility locations
Noise
Visibility from the backyard
Views from inside the home
Neighboring properties
Drainage
Ventilation
Future equipment replacement
Construction access
Equipment that is hidden too aggressively can become difficult to maintain.
At the same time, equipment placed directly beside an outdoor dining area, bedroom window, spa, or major entertaining space can negatively affect how the backyard is enjoyed.
The goal is to make the equipment accessible without making it visually dominant.
Plan for Noise
Modern pool equipment can be significantly more efficient and quieter than older systems, but pumps, heaters, and other mechanical components can still generate sound.
Equipment placement should consider where people will spend time.
Think about the relationship between the equipment area and:
Bedrooms
Neighboring homes
Outdoor kitchens
Dining patios
Fire features
Lounge areas
Spas
Quiet garden spaces
A few feet of additional separation or a better equipment location can make a noticeable difference in how the backyard feels.
Screen Equipment Without Blocking Access
Pool equipment can often be softened or screened using:
Fencing
Masonry walls
Decorative screens
Landscape planting
Purpose-designed equipment enclosures
However, screening should never make routine service unnecessarily difficult.
Technicians may eventually need to repair or replace pumps, filters, heaters, valves, or other components. Equipment that can technically be reached but cannot realistically be removed creates avoidable problems later.
Always leave practical access.
Planting used for screening should also be selected carefully. Shrubs that eventually grow directly into equipment, plumbing, vents, or access areas can create maintenance problems as the landscape matures.
Plan Utilities Before Installing Hardscape
A pool project can require coordination between multiple underground systems.
Depending on the project, these may include:
Pool plumbing
Electrical
Gas
Irrigation
Drainage
Landscape lighting
Outdoor kitchen utilities
Future conduit or sleeves
These systems should be considered before patios, walkways, walls, and other permanent improvements are completed.
Installing sleeves or utility pathways at the appropriate stage can prevent finished hardscape from having to be cut or removed later.
This becomes especially important when a backyard includes a combination of a pool, spa, outdoor kitchen, fire feature, lighting, irrigation, and other improvements.
Think About Future Equipment Replacement
Pool equipment does not last forever.
Even a well-maintained system may eventually need a pump, filter, heater, automation component, or other piece of equipment replaced.
The design should allow equipment to be physically removed and new equipment brought into the area.
A narrow gate, tightly enclosed equipment yard, mature hedge, or permanent structure can turn a straightforward future replacement into a much more difficult project.
Planning for serviceability is one of those details homeowners may never notice when it is done correctly—but they will certainly notice when it is not.
Coordinate Specialized Pool Systems With the Appropriate Professionals
Pool plumbing, electrical systems, heaters, gas lines, bonding, and other specialized components have specific installation and safety requirements.
Those portions of the project should be designed and installed by the appropriately qualified and licensed professionals responsible for that work.
The landscape plan should coordinate with those systems so planting, hardscape, drainage, lighting, walls, and outdoor living features do not interfere with required equipment or future access.
Good pool landscape design is not about taking every trade's job.
It is about making sure all of those systems work together within one well-planned outdoor environment.
Irrigation & Drainage Around a Pool
A new swimming pool changes the way water moves through a backyard.
Existing soil may be replaced by large areas of concrete, porcelain, pavers, or stone. Planting beds may move. Irrigation zones may need to be rerouted. Downspouts and existing yard drainage may suddenly interact with completely different finished elevations.
That is why irrigation and Drainage should be addressed as part of the pool design—not after construction is finished.
Protect Existing Irrigation During Construction
Building a swimming pool often requires significant excavation and access through the property.
Existing irrigation lines may run directly through areas that will become:
The pool excavation
Pool decking
Equipment areas
New patios
Walkways
Walls
Outdoor kitchens
Planting beds
Before construction begins, it is important to understand which irrigation lines can be abandoned, which need to remain active, and which should be rerouted.
Simply cutting and capping lines without understanding what they serve can unintentionally eliminate water to landscaping elsewhere on the property.
Existing valves and zones should be evaluated as part of the overall landscape renovation.
Separate Planting Areas Into Appropriate Irrigation Zones
Different plants have different water requirements.
Trees, shrubs, lawn areas, drought-tolerant planting, and other landscape zones should not automatically receive the same amount of water.
Pool renovations are often an opportunity to improve an older irrigation system and reorganize zones around the new landscape.
Drip irrigation can be particularly useful around poolside planting because water can be delivered directly to the root zone without unnecessarily spraying the pool deck, furniture, walls, or water surface.
Our The Leak Squad team specializes in irrigation troubleshooting, repairs, upgrades, and water-efficient irrigation solutions throughout San Diego.
Keep Irrigation Water Off the Pool Deck
Sprinklers should not continually spray across pool decking.
Repeated overspray can contribute to:
Water waste
Wet walking surfaces
Mineral deposits
Staining
Water entering the swimming pool
Unnecessary moisture against walls and structures
The irrigation layout should be designed around the finished hardscape rather than trying to force an old sprinkler pattern to work after the backyard has changed.
Understand Where Rainwater Will Go
A swimming pool does not eliminate the need for yard drainage.
In many cases, the amount of hardscape surrounding the pool makes drainage even more important.
Rain falling onto:
Pool decks
Patios
Walkways
Outdoor kitchens
Pergolas and patio covers
Roof surfaces
Walls
must eventually be directed somewhere appropriate.
Finished grades should encourage water to move away from structures and toward intentionally planned drainage locations.
Depending on the property, drainage solutions may include:
Area drains
Channel drains
Catch basins
Underground drainage piping
Surface grading
Downspout connections
Other site-specific drainage systems
The correct system depends on the elevations, soil conditions, existing drainage, amount of runoff, and where water can legally and appropriately be discharged.
Do Not Allow Planting Beds to Become Accidental Drainage Basins
It can be tempting to simply slope pool decking toward nearby planting areas.
Sometimes landscape areas can appropriately receive limited runoff, but this needs to be intentional.
Repeatedly directing large amounts of water into a planting bed can create:
Saturated soil
Root problems
Erosion
Mulch displacement
Standing water
Damage to nearby hardscape
Unhealthy plants
Planting and drainage should therefore be planned together.
Watch the Transition Between the Pool Deck and the House
One of the most important elevation relationships is between the house, pool deck, patios, and surrounding landscape.
The finished project should not unintentionally create a condition where water is directed toward doors, foundations, walls, or other vulnerable areas.
This is particularly important when an existing backyard is being completely remodeled and new surfaces are being installed at different elevations.
Grades need to be established before construction rather than adjusted by eye at the end.
Drainage Is Part of the Design
Homeowners naturally focus on the parts of a pool project they can see: the water, tile, coping, decking, landscaping, lighting, and outdoor living features.
Drainage is mostly hidden.
That does not make it less important.
A beautiful backyard that develops standing water every time it rains was not completely designed.
The best pool and spa landscapes manage water intentionally—both the water homeowners want inside the pool and the water they need to move safely through the rest of the property.
Pergolas, Shade & Poolside Structures
Shade can make the difference between a pool area that looks beautiful and one that is actually comfortable to use throughout the day.
San Diego's climate allows homeowners to enjoy outdoor spaces throughout much of the year, but direct afternoon sun can make patios, outdoor kitchens, dining areas, and lounge spaces uncomfortable during warmer months.
Shade should therefore be considered early in the pool and landscape design.
Depending on the property, shade may come from:
Pergolas
Patio covers
Shade structures
Mature trees
New shade trees
Umbrellas
Architectural extensions from the home
A combination of structures and planting
The best solution depends on how the backyard is used and where the sun moves across the property.
Study the Sun Before Choosing the Location
A shade structure should not be positioned simply because an open space is available.
Consider where the sun is during the hours homeowners are most likely to use the backyard.
Morning sun may be desirable around the pool, while strong western afternoon exposure may make a dining area or outdoor kitchen uncomfortable.
Important areas to evaluate include:
Outdoor dining
Lounge seating
Outdoor kitchens
Bar seating
Children's gathering areas
Spa seating
Fire-feature areas
Doors leading from the home
Areas where people commonly watch the pool
A properly located structure can provide relief from the sun without unnecessarily shading the swimming pool itself.
Use Structures to Create Outdoor Rooms
A pergola or patio cover can do more than provide shade.
It can help define a separate outdoor room within a larger pool environment.
For example, the swimming pool may remain an open destination while a nearby pergola defines:
An outdoor dining room
A kitchen and bar
A lounge
A conversation area
A television or entertainment space
A quiet seating area
Professionally designed Decks And Pergolas Contractor improvements can help integrate these structures with the architecture of the home, surrounding hardscape, outdoor living areas, and landscape.
Instead of placing a freestanding structure randomly in the backyard, the goal should be to make it feel like a natural extension of the property.
Coordinate the Structure With the House
A poolside structure should relate visually to the home.
Important design considerations may include:
Rooflines
Architectural style
Column dimensions
Materials
Colors
Trim details
Existing patios
Doors and windows
Sightlines from inside the house
A modern home may call for cleaner lines and a simpler structure, while a Spanish, Mediterranean, Craftsman, or traditional home may benefit from completely different materials and architectural details.
The pool, structure, and house should feel like they belong together.
Plan the Structure Before the Patio Is Built
Pergolas and patio covers may require footings, posts, electrical provisions, drainage coordination, and other structural considerations.
Those elements are much easier to plan before finished hardscape is installed.
If the structure is added later, homeowners may discover that finished concrete, porcelain, pavers, or other materials need to be removed or altered to accommodate required foundations or utilities.
Planning early can also allow for:
Lighting
Ceiling fans
Electrical outlets
Outdoor televisions
Heaters
Speakers
Future appliances
Outdoor kitchen connections
Even when some features will be added later, considering them during the initial design can make future improvements much easier.
Do Not Forget Drainage
A solid patio cover or roof changes the way rainwater moves through the backyard.
Water that once fell across a large open patio may become concentrated along gutters, downspouts, roof edges, or specific drainage points.
Those conditions should be coordinated with the surrounding landscape and drainage system.
A shade structure should improve the backyard without creating a new water problem.
Combine Structural Shade With Trees and Planting
Not every shaded area requires construction.
Well-positioned trees can provide natural shade while also adding scale, privacy, movement, and character to the pool environment.
The strongest designs often combine architectural shade with planting.
A pergola may shade the dining area while a properly positioned tree provides afternoon shade near lounge seating.
This creates different experiences throughout the backyard rather than covering every outdoor area with one large structure.
The objective is to give homeowners choices between sun and shade throughout the day.
Pool Safety, Access & Family-Friendly Design
A pool should be beautiful, but safety must remain part of the design from the beginning.
Swimming pools and spas have specific permitting, barrier, access, electrical, and drowning-prevention requirements. These requirements should be coordinated with the appropriate pool contractor, design professionals, and local building authority as part of the permitting process.
For homeowners, however, good pool safety design goes beyond simply satisfying the minimum code requirements.
The entire backyard should be planned around how people will safely move, gather, supervise children, and access the water.
Plan the Pool Barrier as Part of the Landscape
Pool barriers should not be treated as an afterthought.
Their location can affect:
Backyard circulation
Views
Gates
Planting areas
Patios
Outdoor kitchens
Play areas
Access from the house
Overall appearance of the landscape
A professionally planned Fencing Contractor In San Diego scope can help coordinate privacy fencing and other landscape fencing with the overall design.
However, homeowners should understand that a privacy fence and a code-compliant swimming-pool safety barrier are not automatically the same thing.
Pool-safety barriers and drowning-prevention features need to meet the requirements applicable to the specific property and project.
Preserve Clear Views of the Pool
For families with children, visibility can be extremely important.
Consider whether adults can see the pool from:
Outdoor dining areas
Outdoor kitchens
Lounge seating
Major doors and windows
Covered patios
Other frequently used areas of the backyard
Tall walls, dense planting, outdoor kitchens, structures, or other features should not unintentionally block important sightlines.
Privacy and supervision sometimes compete with one another.
The landscape design should balance both.
Keep Circulation Clear
People moving around a swimming pool are often barefoot and wet.
Walkways should feel comfortable and obvious rather than forcing people through narrow spaces between furniture, planting, walls, or the pool edge.
Pay particular attention to:
Pool entrances
Spa access
Steps
Changes in elevation
Gates
Outdoor showers
Routes to bathrooms
Routes between the house and pool
Routes between the pool and outdoor kitchen
Furniture should also be included in the planning.
A patio may appear large on a drawing until lounge chairs, dining chairs, umbrellas, tables, and other furnishings are placed within it.
The remaining circulation space is what people actually have to walk through.
Make Changes in Elevation Easy to Understand
Steps can become difficult to see around a busy pool environment, especially after dark.
Elevation changes should be intentional and easy to recognize.
Good design can use:
Consistent step dimensions
Contrasting materials
Thoughtful edge details
Appropriate handrails where required
Landscape lighting
Clear walking paths
Lighting becomes particularly important when steps connect the house, pool, spa, outdoor kitchen, and other nighttime gathering areas.
Avoid Creating Climbing Opportunities Near Barriers
Planting, furniture, raised planters, walls, equipment, and decorative features located near pool barriers should be evaluated carefully.
A beautiful planter or piece of outdoor furniture should not unintentionally make it easier for a young child to climb over a required safety barrier.
This is another example of why landscape and pool planning need to happen together.
Something that makes sense visually may create a conflict when the complete environment is considered.
Consider Children Without Designing Only for Children
Family-friendly design should work as children grow.
A large open play area may be valuable when children are young but could later become lawn, artificial turf, a garden, additional entertaining space, or another outdoor feature.
Designing flexible spaces allows the backyard to evolve without requiring another complete remodel.
The same principle applies to pool features.
Homeowners should think about how the property might be used:
Today
Five years from now
Ten years from now
Good landscape design creates a backyard that can change with the family.
Safety Features Do Not Replace Supervision
No fence, alarm, pool cover, gate, or other safety feature eliminates the need for responsible adult supervision around water.
The strongest pool environment combines proper design, required drowning-prevention measures, clear circulation, good visibility, appropriate barriers, and responsible use.
The objective is to create a backyard where beauty, outdoor living, and safety are considered together from the very beginning.
Pool Remodels & Designing Around an Existing Pool
Not every backyard project begins with a new swimming pool.
Many San Diego homeowners already have an existing pool or spa but want to completely rethink the landscape around it.
The pool itself may still be functional while the surrounding backyard feels outdated, disconnected, difficult to maintain, or no longer suited to the way the homeowners use the property.
In these situations, the existing pool can become the starting point for an entirely new outdoor environment.
A thoughtful Landscape Design Process can evaluate what should remain, what should change, and how the existing pool can be integrated into a new overall backyard design.
Start by Evaluating What Already Exists
Before designing around an existing pool, look carefully at the current conditions.
Important questions may include:
Is the pool positioned well within the property?
Is the existing pool deck large enough?
Are the materials outdated or deteriorating?
Are there cracks or settlement around the pool?
Does water drain properly?
Are there awkward elevation changes?
Is there enough room for furniture?
Are the walkways comfortable?
Is privacy adequate?
Are important views being blocked?
Does the planting still make sense?
Is the irrigation functioning properly?
Is the lighting outdated or inadequate?
Does the backyard have enough shade?
Is there room for an outdoor kitchen or fire feature?
Are there areas of the yard that are not being used?
Sometimes the pool itself is not the problem.
The surrounding landscape simply needs to be redesigned.
Decide What Is Worth Keeping
A successful remodel does not necessarily mean removing everything.
Existing features that are structurally sound and still fit the new design may be worth incorporating.
These could include:
Mature trees
Existing walls
Portions of patios
Established planting
Pergolas
Outdoor kitchens
Drainage systems
Landscape lighting infrastructure
Irrigation components
Fencing
The design should determine whether those elements genuinely contribute to the new backyard rather than keeping them simply because they already exist.
Sometimes preserving one feature saves money and adds maturity to the landscape.
Other times, designing around an outdated feature creates compromises throughout the entire project.
Update the Hardscape Around the Pool
Older pool decks are often one of the first areas homeowners want to change.
Replacing or modifying surrounding hardscape can dramatically update the appearance of an existing swimming pool.
A professionally planned Hardscape And Concrete Contractor scope may include:
New pool decking
Patios
Walkways
Steps
Coping transitions
Seat walls
Retaining walls
Outdoor entertaining areas
Connections between old and new materials
When new hardscape meets an existing pool structure, those transitions need careful planning.
Elevations, drainage, existing concrete, expansion and movement, coping conditions, and the relationship between new and existing construction should all be evaluated before selecting the final material.
Reconsider How the Backyard Is Used
An older backyard may have been designed for a completely different stage of life.
A family that once needed a large lawn or children's play area may now want:
More entertaining space
An outdoor kitchen
A fire feature
A shaded dining area
A spa
Low-maintenance planting
Additional privacy
Larger patios
More seating
Improved nighttime lighting
The existing pool does not have to dictate the original backyard layout forever.
The landscape around it can evolve.
Use Planting to Modernize an Existing Pool
Changing the planting can dramatically alter the appearance of an older swimming pool without changing the pool's shape.
Planting can be redesigned to create a completely different atmosphere.
Depending on the home and landscape style, the pool environment might become:
Contemporary
Mediterranean
Tropical-inspired
California native
Coastal
Desert-modern
Drought-tolerant
Resort-inspired
Removing overgrown plants can also open views and make smaller backyards feel larger.
At the same time, new trees and screening plants can improve privacy and soften neighboring structures.
The goal is to create a planting design that looks intentional with both the pool and the architecture of the home.
Improve the Backyard After Dark
Existing pool landscapes frequently have outdated or limited outdoor lighting.
A remodel creates an opportunity to reconsider pathways, trees, steps, walls, gathering areas, and other landscape features.
Lighting should be coordinated before new patios and hardscape are finished so wiring access and future fixture locations can be planned appropriately.
The pool itself may become the nighttime focal point while surrounding landscape lighting provides depth beyond the water.
Correct Existing Problems While the Backyard Is Open
A poolside landscape remodel is also an opportunity to address problems that may have developed over many years.
These can include:
Poor drainage
Broken irrigation
Improper grades
Settled paving
Cracked concrete
Root damage
Poor lighting
Inadequate privacy
Failing walls
Overgrown planting
Utility conflicts
It is usually better to address these issues during the remodel than to install beautiful new finishes over problems that still remain underneath.
A successful pool remodel should not simply make an old backyard look newer.
It should make the entire property work better.
Permits, HOA Approval & Planning Before Construction
Pool and spa projects involve more than design and material selection.
Before construction begins, homeowners need to understand which approvals, permits, plans, and professional services may be required for their specific property.
Requirements can vary based on the city or jurisdiction, property conditions, scope of work, HOA requirements, utilities, grading, walls, structures, and other improvements being proposed.
These items should be investigated early in the project rather than after the design is finished.
Pool and Spa Construction Requires Proper Permitting
Private swimming pools and spas generally require permits from the local building authority.
For properties within the City of San Diego, the Development Services Department has a specific permitting process for private swimming pools, spas, and hot tubs.
The required plans and reviews can depend on the project.
A pool project may involve consideration of:
Pool location
Property lines and setbacks
Easements
Pool barriers
Drowning-prevention requirements
Electrical systems
Plumbing
Gas
Pool equipment
Structural design
Grading
Drainage
Retaining walls
Accessory structures
Other site conditions
The pool contractor and other professionals responsible for specialized portions of the work should coordinate the applicable permits and inspections.
Check Property Conditions Before Finalizing the Design
A beautiful concept is only useful if it can actually be built.
Before committing to a final layout, homeowners should understand important property information such as:
Property boundaries
Easements
Setbacks
Existing utilities
Sewer and water lines
Electrical service
Gas service
Existing drainage
Elevations
Slopes
Retaining walls
Construction access
These conditions can influence where the pool, spa, patios, walls, structures, and other improvements can reasonably be located.
Discovering a major utility or access conflict after the design is complete can lead to unnecessary redesign and additional expense.
Construction Access Should Be Planned Early
Building a pool requires moving substantial amounts of material into and out of the property.
Depending on the project, contractors may need access for:
Excavation equipment
Concrete or shotcrete equipment
Soil removal
Material deliveries
Plumbing materials
Steel
Hardscape materials
Landscape materials
Waste removal
Narrow side yards, gates, neighboring structures, walls, slopes, existing landscaping, and limited street access can all affect construction.
Access should be evaluated before the project begins so homeowners understand how the work will be approached and what existing improvements may need protection or temporary removal.
HOA Approval May Be Separate From City Approval
If the property is located within a homeowners association, the HOA may require architectural or landscape approval before exterior changes are made.
A pool and backyard remodel may require the homeowner to submit items such as:
Site plans
Pool location
Landscape plans
Material selections
Planting information
Walls and fencing
Pergolas or structures
Exterior finishes
Drainage information
Construction details
Other documents required by the association
Every HOA is different, so homeowners should review their current CC&Rs, architectural guidelines, and application requirements before construction begins.
Receiving city approval does not automatically mean HOA approval has been granted.
Likewise, HOA approval does not replace required city or county permits.
They are separate review processes.
Do Not Wait Until Construction to Think About the HOA
HOA review can affect design decisions.
An association may have standards regarding:
Wall heights
Fence materials
Structures
Exterior colors
Landscape appearance
Plant material
Views
Construction hours
Contractor access
Common-area protection
Understanding those requirements early allows the design to address them rather than discovering conflicts after plans have already been completed.
Coordinate the Entire Project Before Breaking Ground
A pool and spa landscape project may involve several different trades and professionals.
Depending on the scope, these could include:
Landscape designers
Landscape contractors
Pool contractors
Engineers
Electricians
Plumbers
Gas contractors
Hardscape installers
Pergola or structure contractors
Fence contractors
Irrigation specialists
Landscape lighting specialists
Each may be responsible for a different portion of the project.
The purpose of complete planning is to make sure those individual scopes work together.
For example, a pool should not be excavated where a future outdoor kitchen needs utilities.
A patio should not be installed before required underground sleeves are considered.
A retaining wall should not be positioned without understanding drainage and elevations.
A tree should not be planted where future pool equipment needs service access.
And finished hardscape should not have to be removed because another trade's underground work was overlooked.
Finalize the Plan Before Construction Begins
Changes made on paper are usually easier than changes made after excavation, concrete, plumbing, walls, or finished materials are already installed.
That is one of the greatest benefits of completing the Landscape Design Process before major construction begins.
A comprehensive plan allows homeowners and contractors to see how the pool, spa, hardscape, planting, drainage, irrigation, lighting, structures, and outdoor living spaces relate to one another.
There will always be field conditions that require adjustments.
But the clearer the overall plan is before construction begins, the better prepared everyone is to make those decisions without losing sight of the finished backyard.
Good planning does not slow down a pool project. It helps prevent avoidable problems from slowing it down later.
Choosing the Right Pool & Landscape Professionals
A pool and spa project can involve several different trades, and choosing the right professionals is one of the most important decisions a homeowner will make.
The swimming pool itself is only one part of the finished backyard.
A complete project may also involve:
Landscape design
Pool and spa construction
Hardscape
Retaining walls
Drainage
Irrigation
Landscape lighting
Planting
Fencing
Pergolas and shade structures
Outdoor kitchens
Fire features
Electrical
Plumbing
Gas
Engineering
Permitting
The goal should not simply be finding someone who can build a pool.
The goal should be assembling the right professionals to create the entire outdoor environment.
Start With the Overall Design
Before individual contractors begin making independent decisions, homeowners should establish the overall vision for the property.
A comprehensive Landscape Design Process can help establish how the pool, spa, patios, planting, structures, lighting, drainage, and outdoor living areas should work together.
This gives the different professionals involved in the project a common direction.
Without an overall plan, individual portions of the project may be designed independently.
That can create situations where:
The pool occupies too much of the backyard
A patio is too small for furniture
An outdoor kitchen conflicts with circulation
Pool equipment is placed in an inconvenient location
Drainage is overlooked
Utilities need to cross completed hardscape
Planting areas become too narrow
Privacy is addressed too late
A future pergola has nowhere appropriate to go
Important views from the house are blocked
A good design helps identify these conflicts before construction begins.
Understand Who Is Responsible for the Pool Construction
Swimming pool construction is a specialized trade.
California identifies swimming-pool construction under the C-53 Swimming Pool Contractor classification.
CSLB also states that a landscape contractor may contract for a swimming pool when the pool is part of a larger landscaping project.
The important point for homeowners is that the specialized pool construction needs to be performed within the appropriate licensing requirements.
When interviewing professionals, homeowners should verify contractor licenses directly through the California Contractors State License Board and confirm that the license is current and appropriate for the work being performed.
Do Not Choose Professionals Based on Price Alone
Price matters, but it should not be the only consideration.
A lower proposal may not include the same scope, materials, preparation, coordination, or level of design.
When comparing contractors, homeowners should look carefully at:
Exact scope of work
Licensing
Insurance
Experience
References
Materials
Construction methods
What is included
What is excluded
Permit responsibilities
Engineering responsibilities
Cleanup
Warranties
Change-order procedures
Communication
Project coordination
Two proposals with very different prices may not actually be proposing the same project.
The better comparison is not simply:
“Which contractor costs less?”
It is:
“What exactly am I receiving for the investment?”
Look at Completed Work
Photos are helpful, but completed projects can reveal much more about a contractor's abilities.
When evaluating previous work, look beyond the swimming pool.
Consider how the contractor or design team handled:
Pool placement
Hardscape transitions
Steps and elevations
Walls
Planting
Lighting
Outdoor living areas
Privacy
Material combinations
Drainage
Overall proportion
The strongest projects should look cohesive.
The pool should not appear as though it was designed first and the landscape was simply filled in around it afterward.
Ask How the Different Trades Will Be Coordinated
A complete backyard may involve many people working at different times.
Homeowners should understand:
Who is responsible for the overall project
Who communicates design changes
Who coordinates elevations
Who coordinates underground utilities
Who handles permits
Who schedules inspections
Who protects completed work
Who communicates with the homeowner
What happens when unexpected conditions are discovered
Good communication between trades can prevent expensive mistakes.
For example, the landscape contractor needs to understand where pool plumbing and electrical systems are located.
The pool contractor needs to know future hardscape elevations.
The outdoor kitchen needs utilities before paving is completed.
Lighting and irrigation may require sleeves beneath patios.
Drainage needs to work with all of them.
Each system affects another.
Choose Professionals Who Think About the Finished Property
The best professionals should ask questions about more than their individual portion of the job.
They should want to understand:
How the homeowners use the property
What improvements are planned
What needs to remain
What may be added later
Where people will gather
What views are important
What maintenance level is desired
What problems currently exist
What the finished backyard should feel like
That broader thinking is what turns a construction project into a complete landscape.
What Should a Complete Pool & Spa Landscape Design Include?
A complete pool and spa landscape design should show much more than the outline of the swimming pool.
The purpose of the design is to establish how the entire backyard will function before major construction begins.
Depending on the scope of the property, the plan may address:
Pool and spa location
Pool shape and proportion
Pool decking
Coping relationships
Patios
Walkways
Steps
Elevation changes
Retaining walls
Outdoor kitchens
Fire features
Pergolas and shade structures
Fencing
Privacy screening
Planting
Irrigation
Landscape lighting
Drainage
Equipment areas
Utility coordination
Furniture locations
Construction access
Future improvements
Not every project requires every one of these elements.
The important part is identifying which elements affect the property before construction begins.
Site Analysis Comes First
Before designing the new backyard, the existing property needs to be understood.
A site analysis may consider:
Existing structures
Doors and windows
Property access
Existing patios
Walls
Trees
Planting
Slopes
Drainage
Irrigation
Utilities
Sun exposure
Shade
Neighboring properties
Privacy
Views
This information provides the foundation for the design.
The pool should respond to the property rather than forcing the property to respond to a predetermined pool shape.
The Plan Should Show How People Will Use the Backyard
A good design should help homeowners visualize everyday life in the finished space.
Where will people:
Enter the backyard?
Walk to the pool?
Dry off?
Sit in the sun?
Sit in the shade?
Eat?
Cook?
Gather?
Watch children in the pool?
Access the spa?
Relax around a fire feature?
Store pool equipment?
Access the side yard?
These questions influence dimensions and relationships throughout the design.
A pool deck that looks large enough without furniture may become uncomfortable once lounge chairs and umbrellas are added.
An outdoor kitchen may fit physically but create a bottleneck between the house and pool.
A beautiful planter may block an important view.
Design allows those problems to be solved before materials are installed.
2D Plans Help Organize the Property
A two-dimensional landscape plan provides a bird's-eye view of the project.
It can help establish:
Pool placement
Hardscape layout
Walkways
Planting beds
Structures
Walls
Furniture areas
Outdoor living spaces
Circulation
This allows homeowners to understand the relationships between different parts of the property.
It also provides a common reference for contractors involved in the project.
3D Design Helps Homeowners Understand the Experience
Some decisions are difficult to understand from a flat plan alone.
Three-dimensional design can help homeowners visualize:
Pool proportions
Spa elevations
Walls
Steps
Pergolas
Outdoor kitchens
Planting
Views
Material relationships
The connection between the home and backyard
This can be particularly valuable on properties with elevation changes or several outdoor living features.
A 3D view does not replace construction documents or engineering where those are required.
Its value is helping homeowners understand what the finished environment may look and feel like before construction begins.
Material Selection Should Be Part of the Design
The design process should also begin establishing the materials that will define the finished backyard.
These may include:
Pool decking
Coping
Patio materials
Wall finishes
Steps
Pavers
Concrete finishes
Porcelain
Natural stone
Gravel
Decorative rock
Wood or composite materials
Fence materials
Material selection should consider more than appearance.
Homeowners should also think about:
Slip resistance
Heat
Maintenance
Durability
Color
Texture
Cost
Installation requirements
How materials transition into one another
The strongest designs usually use a controlled material palette rather than introducing a different material at every feature.
Planting Should Be Designed—not Added Later
Planting deserves the same level of planning as the hardscape.
Trees, shrubs, grasses, succulents, groundcovers, and accent plants should be selected for:
Mature size
Sun exposure
Water requirements
Maintenance
Poolside conditions
Privacy
Views
Root characteristics
Seasonal interest
Architectural style
Planting can dramatically affect whether a pool environment feels harsh and exposed or comfortable and complete.
Lighting Should Be Included Before Construction Ends
Landscape lighting should also be considered during design.
Potential fixture locations, wiring routes, sleeves beneath hardscape, transformers, and future expansion are easier to address before construction is complete.
Lighting can then support the same design established during the day by highlighting:
Trees
Walls
Walkways
Steps
Outdoor kitchens
Pergolas
Fire features
Architectural elements
The backyard should feel intentional both during the day and after sunset.
Plan What Is Hidden as Carefully as What Is Visible
Some of the most important elements of a pool landscape will eventually disappear underground.
These can include:
Drainage
Irrigation
Electrical conduit
Landscape-lighting wiring
Gas
Utility sleeves
Pool plumbing
Once patios, walls, and landscaping are installed, changing these systems becomes much more difficult.
A complete design should therefore think about underground infrastructure before beautiful finish materials cover it.
Design for the Finished Backyard—not Just the First Phase
Not every homeowner wants or needs to build everything at once.
A complete plan can still be valuable when construction will happen in phases.
For example, the first phase might include the pool, hardscape, drainage, and irrigation.
A future phase might add:
An outdoor kitchen
A pergola
A fire feature
Additional lighting
Planting
A new fence
If those future improvements are considered in the original design, utilities, space, elevations, and access can be planned for them in advance.
That can help prevent homeowners from paying to remove finished work several years later.
The purpose of a complete Landscape Design Process is not simply to create a beautiful drawing.
It is to create a roadmap for building the entire outdoor environment.
How Much Does a Pool & Complete Backyard Remodel Cost?
One of the first questions homeowners naturally ask is:
“How much is this going to cost?”
There is no single price for a pool and complete backyard remodel because two properties can have similar-sized yards and require very different amounts of work.
The swimming pool itself is only one part of the overall investment.
A complete outdoor transformation may include:
Pool and spa construction
Excavation
Engineering
Permits
Pool equipment
Electrical and gas
Pool decking
Coping
Patios
Walkways
Retaining walls
Drainage
Irrigation
Landscape lighting
Planting
Trees
Decorative rock or mulch
Fencing
Pergolas or patio covers
Outdoor kitchens
Fire features
Site access and protection
Demolition and removal of existing improvements
The final investment depends on how many of these elements are included and the level of materials and finishes selected.
Start With the Property—not a Square-Foot Price
Pool and landscape projects should not be estimated based only on the size of the backyard.
The property itself can have a significant impact on construction.
Important cost factors can include:
Flat versus sloped terrain
Soil conditions
Retaining walls
Excavation requirements
Limited equipment access
Narrow side yards
Existing concrete or structures that require demolition
Underground utilities
Drainage conditions
Existing trees and roots
Elevation changes
Engineering requirements
Permit requirements
HOA requirements
A relatively simple project on an accessible, level property may be very different from a similar design on a hillside property with restricted access and substantial retaining work.
This is why a detailed site evaluation and Landscape Design Process should come before homeowners commit to a final construction budget.
Pool Size Is Only One Cost Factor
Making a swimming pool larger can increase cost, but size is not the only factor.
Pool features can also influence the investment.
These may include:
Integrated spas
Raised spas
Baja shelves
Benches
Steps
Waterfalls
Water features
Raised walls
Specialty finishes
Tile selections
Coping materials
Automation
Heating systems
Lighting
Additional equipment
A smaller pool with extensive features and premium finishes may cost more than a larger but simpler pool.
The same principle applies to the surrounding landscape.
Material Choices Can Change the Budget Significantly
Pool decking is a good example.
Homeowners may be comparing:
Standard concrete
Decorative concrete
Concrete pavers
Porcelain pavers
Natural stone
Travertine
Each material has different costs for the product itself, preparation, installation, cutting, finishing, and long-term maintenance.
The least expensive material on a sample board is not always the least expensive installed system.
That is why material selections should be made in the context of the complete design and construction method.
Outdoor Living Features Should Be Budgeted Early
Outdoor kitchens, pergolas, fire features, walls, and specialty structures can represent a substantial portion of a complete backyard project.
Homeowners should identify these priorities early rather than using the entire budget on the pool and discovering afterward that there is little remaining for the environment around it.
Before finalizing the design, decide which elements are:
Essential
Highly desired
Optional
Appropriate for a future phase
This helps direct the available budget toward the features that matter most.
Remember the Infrastructure You Cannot See
Some of the most important expenses will eventually be underground.
These can include:
Drainage
Irrigation
Electrical conduit
Gas
Pool plumbing
Landscape-lighting wiring
Utility sleeves
Footings
Base preparation
Reinforcement
Reducing or eliminating important infrastructure to spend more money on visible finishes can create much larger expenses later.
A successful budget needs to account for both what homeowners will see and what makes the finished project perform correctly.
Plan for Existing Conditions
Remodeling an existing backyard can reveal conditions that were not completely visible during the initial design.
Examples may include:
Buried concrete
Unknown irrigation lines
Abandoned utilities
Poor soil
Root systems
Improper drainage
Failed retaining walls
Unexpected grading conditions
Homeowners should understand how their contractor handles unforeseen conditions and change orders before work begins.
A reasonable project budget should also maintain some flexibility rather than committing every available dollar before construction starts.
Consider Building the Landscape in Phases
A complete design does not always have to be constructed at one time.
A homeowner might complete:
Phase One
Pool and spa
Major grading
Drainage
Underground utilities
Pool decking
Phase Two
Outdoor kitchen
Pergola
Fire feature
Additional hardscape
Phase Three
Planting
Landscape lighting
Decorative finishes
Additional outdoor amenities
The exact sequence depends on the property, and some improvements need to be coordinated earlier even if they will not be completed immediately.
The advantage of designing the entire property first is that each phase can support the next.
Sleeves can be installed before concrete.
Utilities can be positioned for a future outdoor kitchen.
Footings can be planned for a future pergola.
Drainage can be sized around the finished project.
This prevents homeowners from repeatedly tearing apart completed work.
Establish the Budget During Design
Budget should be discussed during design—not after the entire dream backyard has already been developed.
The design process can help determine where to invest, where to simplify, and what might reasonably be completed later.
Sometimes changing a material, reducing the size of a patio, simplifying a wall, or postponing one feature can preserve the most important parts of the design without sacrificing the overall vision.
Good budgeting is not about making every decision based on the lowest price.
It is about investing in the parts of the project that matter most while building the backyard correctly from the beginning.
Why Homeowners Choose Nature's Elements Landscaping
A pool and spa can become one of the most important features in a backyard, but homeowners still need someone thinking about everything that happens outside the water.
That is where Nature's Elements Landscaping brings a different perspective to the project.
Since 2004, we have helped San Diego homeowners design and build complete outdoor environments by looking at the entire property rather than treating each landscape feature as an isolated project.
Our focus is on how the pool and spa connect with:
Patios and walkways
Hardscape
Retaining walls
Drainage
Irrigation
Planting
Landscape lighting
Outdoor kitchens
Fire features
Pergolas
Fencing
Privacy
Views
Elevation changes
Outdoor entertaining
Long-term maintenance
Every property is different, and every homeowner uses their backyard differently.
That is why we begin by understanding the property and the people who will use it.
Complete Landscape Planning
Our Landscape Design Process allows homeowners to develop the entire outdoor environment before major construction begins.
Depending on the project, that process may include:
Site evaluation
2D landscape planning
3D landscape design
Hardscape layout
Planting design
Lighting design
Drainage planning
Irrigation planning
Outdoor living features
Material selections
HOA design assistance
Phased construction planning
The objective is to identify how the different pieces of the project connect before they are installed.
Landscape Design and Construction Experience Since 2004
Nature's Elements Landscaping is a family-owned San Diego landscape company and licensed California C-27 Landscape Contractor.
Our experience includes projects involving:
Complete landscape renovations
Hardscape and concrete
Retaining walls
Outdoor kitchens
Fire features
Pergolas
Fencing
Landscape lighting
Irrigation
Drainage
Artificial turf
Sod
Planting
Landscape maintenance
When a swimming pool or spa becomes part of a larger landscape project, our role is to help ensure that the landscape surrounding it is thoughtfully designed and coordinated with the pool portion of the project.
Specialized swimming-pool construction, engineering, electrical, and other regulated work should be performed by the appropriately licensed professionals responsible for those portions of the project.
We Look Beyond the Pool
Our goal is not simply to ask:
“Where should the pool go?”
We want to understand:
What will you see when you walk into the backyard?
What will you see from inside the house?
Where will people gather?
Where will you cook?
Where will you eat?
Where will you sit in the shade?
How will people move around the pool?
What needs privacy?
What views should remain open?
Where will the water drain?
Where will the equipment go?
What will the landscape look like after sunset?
How large will the plants become?
What might you want to add five years from now?
These questions help create a backyard that works as a complete environment.
Designed for San Diego
San Diego properties present very different landscape conditions.
Coastal properties may face salt exposure, smaller lots, and privacy challenges.
Inland properties may experience significantly more heat.
Hillside properties may require careful consideration of retaining walls, drainage, slopes, and access.
Older neighborhoods may have mature trees, existing utilities, unusual lot configurations, and outdated infrastructure.
There is no single pool-and-landscape formula that works for every property.
The design needs to respond to the actual site.
Design It Once. Build It With a Plan.
One of the greatest advantages of developing the complete landscape first is having a roadmap.
Even when construction happens in stages, homeowners can understand where the project is ultimately going.
That helps prevent expensive decisions such as:
Installing concrete where a future utility needs to run
Building a patio where a future pergola footing belongs
Planting a tree where pool equipment requires access
Locating an outdoor kitchen where it interrupts circulation
Installing drainage that does not account for future hardscape
Completing a patio that later needs to be removed
The more decisions that can be resolved during design, the fewer surprises homeowners may encounter during construction.
Ready to Start Planning Your Pool & Spa Landscape?
If you are considering a new pool, spa, or complete backyard transformation, begin by planning the entire outdoor environment.
Tell us about your property, what you would like to change, and how you envision using your backyard.
Get A Quote and start developing a plan for a pool and landscape that work together from the beginning.
Bedding Sand, Joint Sand & Polymeric Sand
Once the aggregate base has been properly prepared and compacted, the next layers of a traditional interlocking concrete paver system help set, stabilize, and connect the individual paving units.
Two materials homeowners commonly hear about are bedding sand and joint sand.
They serve very different purposes.
Understanding that difference is important because using the wrong material—or using the right material incorrectly—can affect the performance of the entire paved surface.
A professionally installed Hardscape And Concrete Contractor project should consider the paver, base, bedding material, joints, edges, drainage, and intended use as one complete construction system.
What Is Bedding Sand?
Bedding sand is the thin layer installed directly beneath traditional interlocking concrete pavers.
Its purpose is to provide a consistent setting bed that allows the pavers to be installed at the proper elevation and helps accommodate small variations in unit thickness.
Industry guidance generally calls for properly graded concrete sand rather than extremely fine sand.
The bedding layer should be:
Consistent
Properly screeded
Undisturbed before paver placement
Installed over a correctly prepared base
Appropriate for the specific paving system
Bedding sand should not be used to compensate for major low spots or an improperly graded aggregate base.
By the time bedding sand is installed, the base beneath it should already have the required slope, elevations, and overall shape.
Bedding Sand Is Not a Leveling Material for a Bad Base
One common installation mistake is using excessive bedding material to correct an uneven base.
For example, if the compacted base has a low spot, adding additional sand to fill that depression may appear to solve the problem temporarily.
But the pavement is then supported by bedding material of inconsistent thickness.
That can contribute to uneven settlement.
The structural correction should generally happen in the base—not by dramatically changing the bedding layer.
This is why the preparation underneath the pavers is so important.
What appears to be a small shortcut during installation can become visible years later at the finished surface.
What Is Joint Sand?
Joint sand is installed between the individual pavers after they have been placed.
The sand fills the joints and helps the units function together as an interlocking pavement.
For traditional concrete pavers, joint material helps transfer forces between adjacent units and supports the interlocking action of the pavement.
Properly filled joints can help:
Stabilize individual pavers
Maintain alignment
Support interlock
Reduce unnecessary movement
Maintain more consistent joints
The joint sand needs to be appropriately sized so it can enter and fill the spaces between the pavers.
Simply sweeping any available sand across the surface is not the same as using an appropriate jointing material.
Joint Sand Needs to Fill the Entire Joint
The goal is not simply to cover the top of the joint.
Joint material needs to work its way down between the paving units.
For traditional interlocking installations, this commonly involves:
Sweeping joint material across the pavers
Compacting the pavement
Adding additional joint material
Repeating the process as required
Filling the joints to the appropriate level
The compaction process helps settle the joint sand farther into the spaces between the units.
If joints are not properly filled, pavers may have less support from neighboring units.
What Is Polymeric Sand?
Polymeric sand is a manufactured jointing product that combines graded sand with binding agents.
After the material is installed and properly activated according to the manufacturer's directions, the binders help the joint material become more resistant to erosion and displacement than loose conventional sand.
Polymeric sand is commonly considered for:
Patios
Walkways
Driveways
Pool areas
Courtyards
Other interlocking paver applications
However, polymeric sand should not be treated as a universal solution for every paver installation.
Different products are designed for different:
Joint widths
Paver types
Traffic conditions
Drainage conditions
Installation environments
The manufacturer's specifications should always be reviewed before selecting the product.
Polymeric Sand Does Not Fix an Improper Installation
This is an important point.
Polymeric sand cannot compensate for:
Poor base preparation
Inadequate compaction
Missing edge restraints
Improper slopes
Moving pavers
Excessively large or inappropriate joints
Drainage problems
If the pavers are moving because the underlying pavement system is failing, installing stronger joint material does not correct the original problem.
The pavement needs to be structurally stable first.
Installation Conditions Matter
Polymeric jointing products generally have specific installation requirements.
Depending on the manufacturer, these may address:
Surface cleanliness
Joint depth
Joint width
Weather conditions
Temperature
Moisture
Compaction
Activation with water
Cure time
Improper activation can cause problems.
Too little water may prevent the product from activating correctly.
Excessive water may wash binders from the joints or leave residue on the surface.
Allowing polymeric material to remain on the face of the pavers before activation can also contribute to staining or haze.
This is why installation instructions should be followed for the exact product being used.
Polymeric Sand and Weed Growth
Polymeric sand is sometimes marketed primarily as a way to stop weeds.
It can help make joints less hospitable to weed growth when installed and maintained properly, but no outdoor paving system should be represented as permanently weed-proof.
Weed seeds can eventually settle from above into dust and organic material that accumulates within joints.
Keeping the paved surface clean and maintaining joints remains important.
Joint Material May Need Maintenance
Paver joints are exposed to:
Rain
Irrigation
Cleaning
Foot traffic
Vehicle traffic
Wind
Organic debris
Normal weathering
Over time, some joint material may need to be replenished or repaired.
That does not necessarily mean the pavement has failed.
Joint maintenance is part of caring for many segmental paving systems.
The important thing is recognizing when normal maintenance becomes evidence of a larger problem.
If joints repeatedly empty because the pavers are moving or water is washing material away, the underlying cause should be investigated.
The Correct Sand Depends on the Complete Paving System
Bedding sand, conventional joint sand, and polymeric sand are not interchangeable materials.
Each serves a specific purpose.
Professional installation begins by understanding what each layer is supposed to accomplish and selecting materials compatible with the paver manufacturer's requirements and the overall pavement design.
The sand may seem like one of the least expensive materials in a paver project—but it plays an important role in how the entire finished surface performs.
Bedding Sand, Joint Sand & Polymeric Sand
Once the aggregate base has been properly prepared and compacted, the next layers of a traditional interlocking concrete paver system help set, stabilize, and connect the individual paving units.
Two materials homeowners commonly hear about are bedding sand and joint sand.
They serve very different purposes.
Understanding that difference is important because using the wrong material—or using the right material incorrectly—can affect the performance of the entire paved surface.
A professionally installed Hardscape And Concrete Contractor project should consider the paver, base, bedding material, joints, edges, drainage, and intended use as one complete construction system.
What Is Bedding Sand?
Bedding sand is the thin layer installed directly beneath traditional interlocking concrete pavers.
Its purpose is to provide a consistent setting bed that allows the pavers to be installed at the proper elevation and helps accommodate small variations in unit thickness.
Industry guidance generally calls for properly graded concrete sand rather than extremely fine sand.
The bedding layer should be:
Consistent
Properly screeded
Undisturbed before paver placement
Installed over a correctly prepared base
Appropriate for the specific paving system
Bedding sand should not be used to compensate for major low spots or an improperly graded aggregate base.
By the time bedding sand is installed, the base beneath it should already have the required slope, elevations, and overall shape.
Bedding Sand Is Not a Leveling Material for a Bad Base
One common installation mistake is using excessive bedding material to correct an uneven base.
For example, if the compacted base has a low spot, adding additional sand to fill that depression may appear to solve the problem temporarily.
But the pavement is then supported by bedding material of inconsistent thickness.
That can contribute to uneven settlement.
The structural correction should generally happen in the base—not by dramatically changing the bedding layer.
This is why the preparation underneath the pavers is so important.
What appears to be a small shortcut during installation can become visible years later at the finished surface.
What Is Joint Sand?
Joint sand is installed between the individual pavers after they have been placed.
The sand fills the joints and helps the units function together as an interlocking pavement.
For traditional concrete pavers, joint material helps transfer forces between adjacent units and supports the interlocking action of the pavement.
Properly filled joints can help:
Stabilize individual pavers
Maintain alignment
Support interlock
Reduce unnecessary movement
Maintain more consistent joints
The joint sand needs to be appropriately sized so it can enter and fill the spaces between the pavers.
Simply sweeping any available sand across the surface is not the same as using an appropriate jointing material.
Joint Sand Needs to Fill the Entire Joint
The goal is not simply to cover the top of the joint.
Joint material needs to work its way down between the paving units.
For traditional interlocking installations, this commonly involves:
Sweeping joint material across the pavers
Compacting the pavement
Adding additional joint material
Repeating the process as required
Filling the joints to the appropriate level
The compaction process helps settle the joint sand farther into the spaces between the units.
If joints are not properly filled, pavers may have less support from neighboring units.
What Is Polymeric Sand?
Polymeric sand is a manufactured jointing product that combines graded sand with binding agents.
After the material is installed and properly activated according to the manufacturer's directions, the binders help the joint material become more resistant to erosion and displacement than loose conventional sand.
Polymeric sand is commonly considered for:
Patios
Walkways
Driveways
Pool areas
Courtyards
Other interlocking paver applications
However, polymeric sand should not be treated as a universal solution for every paver installation.
Different products are designed for different:
Joint widths
Paver types
Traffic conditions
Drainage conditions
Installation environments
The manufacturer's specifications should always be reviewed before selecting the product.
Polymeric Sand Does Not Fix an Improper Installation
This is an important point.
Polymeric sand cannot compensate for:
Poor base preparation
Inadequate compaction
Missing edge restraints
Improper slopes
Moving pavers
Excessively large or inappropriate joints
Drainage problems
If the pavers are moving because the underlying pavement system is failing, installing stronger joint material does not correct the original problem.
The pavement needs to be structurally stable first.
Installation Conditions Matter
Polymeric jointing products generally have specific installation requirements.
Depending on the manufacturer, these may address:
Surface cleanliness
Joint depth
Joint width
Weather conditions
Temperature
Moisture
Compaction
Activation with water
Cure time
Improper activation can cause problems.
Too little water may prevent the product from activating correctly.
Excessive water may wash binders from the joints or leave residue on the surface.
Allowing polymeric material to remain on the face of the pavers before activation can also contribute to staining or haze.
This is why installation instructions should be followed for the exact product being used.
Polymeric Sand and Weed Growth
Polymeric sand is sometimes marketed primarily as a way to stop weeds.
It can help make joints less hospitable to weed growth when installed and maintained properly, but no outdoor paving system should be represented as permanently weed-proof.
Weed seeds can eventually settle from above into dust and organic material that accumulates within joints.
Keeping the paved surface clean and maintaining joints remains important.
Joint Material May Need Maintenance
Paver joints are exposed to:
Rain
Irrigation
Cleaning
Foot traffic
Vehicle traffic
Wind
Organic debris
Normal weathering
Over time, some joint material may need to be replenished or repaired.
That does not necessarily mean the pavement has failed.
Joint maintenance is part of caring for many segmental paving systems.
The important thing is recognizing when normal maintenance becomes evidence of a larger problem.
If joints repeatedly empty because the pavers are moving or water is washing material away, the underlying cause should be investigated.
The Correct Sand Depends on the Complete Paving System
Bedding sand, conventional joint sand, and polymeric sand are not interchangeable materials.
Each serves a specific purpose.
Professional installation begins by understanding what each layer is supposed to accomplish and selecting materials compatible with the paver manufacturer's requirements and the overall pavement design.
The sand may seem like one of the least expensive materials in a paver project—but it plays an important role in how the entire finished surface performs.
Edge Restraints: Why Pavers Spread & Separate
A properly constructed paver surface needs more than support underneath it.
It also needs support around its perimeter.
Traditional interlocking concrete pavers rely on edge restraints to help prevent the individual units from spreading outward under horizontal forces.
Without adequate restraint, movement can begin at the perimeter and gradually affect the pavement farther inward.
Homeowners may eventually notice:
Joints becoming wider
Border pavers moving
Uneven edges
Pattern distortion
Loose pavers
Joint material disappearing
Settlement along the perimeter
The pavers themselves may still be perfectly good.
The problem can be that the paving system has lost the lateral support needed to keep the units together.
Why Edge Restraints Matter
Interlocking pavers function by working together rather than as completely independent pieces.
Joint material and the contact between neighboring pavers help distribute forces through the pavement.
But the system needs something at the perimeter to resist outward movement.
Industry guidance considers edge restraints an essential part of traditional interlocking concrete pavement.
They may be required:
Around the outside perimeter
At changes between paving materials
Along certain pattern transitions
Where the pavement does not terminate against an existing rigid structure
Without proper perimeter restraint, the interlocking system can gradually loosen.
What Can Be Used as an Edge Restraint?
Edge-restraint systems vary depending on the project.
Possible options may include:
Concrete
Precast concrete
Existing curbs
Building foundations
Metal restraint systems
Aluminum restraints
Steel restraints
Plastic or engineered restraint systems
Cut stone
Other manufacturer-approved systems
The correct choice depends on:
Pedestrian versus vehicle traffic
Base material
Paver size
Edge conditions
Adjacent landscape
Curves
Driveway conditions
Installation method
No single restraint is ideal for every project.
The Base Needs to Support the Edge Restraint
A restraint is only as stable as what supports it.
For systems mechanically anchored into an aggregate base, the prepared base needs to extend sufficiently beyond the paving edge to support the restraint and its anchors.
Simply ending the aggregate base exactly beneath the final paver can leave little structural support for certain edge systems.
This is another reason excavation and base preparation should account for the entire pavement assembly—not merely the visible dimensions of the patio.
Soil Alone Is Not a Reliable Edge Restraint
Backfilling dirt against the outside row of pavers may appear to hold them in position initially.
But soil can:
Settle
Erode
Expand
Contract
Become saturated
Be disturbed by planting or maintenance
For traditional interlocking pavement, soil by itself should not be expected to provide the same permanent lateral restraint as a properly designed edge system.
This becomes particularly important next to planting beds.
The edge can look stable on the day the project is completed but gradually begin moving as soil conditions change.
Curves Require Careful Installation
Curved patios and walkways can create beautiful transitions into planting areas, but curved edges still require proper restraint.
The restraint system needs to follow the curve while remaining securely supported.
Poorly restrained curves may eventually show:
Opening joints
Irregular borders
Moving cuts
Distorted patterns
The more complex the perimeter, the more important it becomes to plan both the visible paver layout and the construction supporting it.
Driveways Place More Demand on Edges
Vehicle traffic introduces additional horizontal forces.
Turning wheels can place significant pressure on pavers near driveway edges.
That makes proper edge restraint especially important at:
Driveway entrances
Garage transitions
Curved driveway borders
Areas where vehicles turn
Transitions between paving materials
A patio that only carries foot traffic and a driveway carrying vehicles should not automatically use identical construction details.
Water Can Contribute to Edge Problems
Water moving through or around the pavement can affect both the aggregate base and surrounding soils.
If runoff repeatedly erodes material beside a paver edge, even a well-installed system can eventually lose support.
That is why professionally planned Drainage should be considered alongside paver construction.
The design should understand:
Where surface water originates
Where the pavers slope
Where roof runoff enters the area
Whether planting beds sit above or below the paving
Whether erosion can occur along an edge
Whether drains or other water-management systems are needed
Water and hardscape should never be planned independently.
Edge Restraints Should Not Be Installed on Loose Bedding Sand
The restraint needs to connect to a stable supporting condition.
Industry guidance specifically cautions against treating the bedding layer as the structural foundation for the edge restraint.
Bedding sand is designed to support the paving units in a very specific way.
It is not intended to anchor the perimeter of the pavement.
This is another example of why every layer needs to perform its own job.
Landscape Design Affects Paver Edges Too
The edge of a patio may transition into:
Planting
Artificial turf
Natural lawn
Decorative rock
Gravel
Concrete
Walls
Steps
Another paving material
Those transitions should be considered during the Landscape Design Process.
The best edge detail is both structurally appropriate and visually compatible with the surrounding landscape.
A patio should not look like the installer simply stopped laying pavers when they reached the end of the drawing.
The transition should feel intentional.
Small Edge Problems Can Become Larger Pavement Problems
A loose perimeter paver may appear insignificant.
But once the edge begins moving, neighboring units have more room to move as well.
Joints can widen.
Joint sand can disappear.
The laying pattern can begin changing.
Eventually, a problem that started along several feet of perimeter can affect a much larger portion of the pavement.
This is why edge restraints deserve the same attention as the more visible pavers.
A successful interlocking pavement needs support underneath it, properly filled joints between it, and dependable restraint around it.
Drainage & Grading for Paver Patios and Driveways
A paver installation can be beautifully designed and properly compacted, but if water has nowhere appropriate to go, problems can still develop.
Drainage and grading should be planned before excavation begins—not after the pavers are installed.
A professionally designed Drainage system considers where water originates, how it moves across the property, and where it can safely be directed.
This becomes especially important when installing large areas of hardscape.
A new paver patio or driveway changes the surface of the property. Areas that once absorbed some rainfall may now move water across the finished paving instead.
The design needs to anticipate that change.
Start With the Existing Property
Before establishing finished paver elevations, look at the entire site.
Important conditions may include:
House foundations
Door thresholds
Garage floors
Existing patios
Driveways
Sidewalks
Retaining walls
Neighboring properties
Existing drains
Downspouts
Planting areas
Slopes
Pool decks
Low areas where water currently collects
The paver surface needs to connect with these existing elevations while still directing water appropriately.
A patio should not solve one elevation problem by creating another.
Create Positive Surface Drainage
Finished pavers should be graded so water moves intentionally rather than collecting in random low areas.
The appropriate direction depends on the property.
Water may need to move toward:
A landscape drain
A channel drain
A catch basin
Another approved drainage system
An appropriate landscape area
A permitted discharge location
The important point is that the destination should be established before the final paving elevations are determined.
Water should not be directed toward the home simply because that was the easiest direction to pitch the patio.
The Base Should Follow the Intended Grade
Drainage is not created only with the top layer of pavers.
The supporting pavement system should generally be constructed to follow the intended finished elevations.
Trying to create major slope changes using extra bedding sand can result in inconsistent support beneath the pavers.
The grading should be established through the properly prepared subgrade and aggregate base so the bedding layer can remain consistent.
This connects drainage directly back to professional Hardscape And Concrete Contractor construction.
Good hardscape installation considers both what homeowners see and the supporting system underneath it.
Watch Water Coming From the Roof
Roof runoff can introduce a surprising amount of water into a patio or driveway area.
Before installing pavers, identify:
Existing downspouts
Roof valleys
Drainage pipes
Patio-cover runoff
Gutters
Areas where water currently exits the roof system
A downspout emptying directly onto a new paver patio may cause staining, erosion at the perimeter, joint-material loss, or concentrated water movement.
In some projects, downspouts may need to be connected to an appropriate drainage system before the paving is completed.
That work is much easier while the area is already excavated.
Do Not Ignore Water Beneath the Pavers
Surface water is only part of the equation.
Water can also enter a traditional paver system through joints and surrounding soil.
A properly designed pavement system should be able to manage normal moisture without losing its structural support.
Problem conditions may develop when:
The subgrade remains saturated
Water becomes trapped beneath the pavement
Fine soil migrates into the base
Water continually erodes the edge
Drainage pipes leak beneath the paving
Irrigation repeatedly saturates the same area
These conditions should be addressed rather than simply covered with additional aggregate.
Plan Drains Before Installing Pavers
When drains are necessary, their location and elevation need to be coordinated with the paving layout.
Common drainage components around hardscape may include:
Area drains
Catch basins
Channel drains
Trench drains
Underground solid drainage pipe
Downspout connections
Drain elevations should relate correctly to the finished paving surface.
A drain that sits too high cannot collect water effectively.
A drain installed unnecessarily low may create an awkward depression in the paving.
The paving pattern should also be considered so cuts around drains look intentional rather than improvised.
Driveways Have Their Own Drainage Challenges
Driveways may receive water from several directions at once.
Potential sources include:
The street
The garage
Roof runoff
Side-yard drainage
Adjacent slopes
Neighboring surfaces
The driveway should be designed to prevent unnecessary water from entering the garage or collecting against the house.
Properties that slope toward the garage may require additional drainage planning, potentially including a channel or trench drain depending on the site.
This should be addressed during the Landscape Design Process, before final elevations and paving materials are selected.
Irrigation Can Affect Paver Performance Too
Sprinklers should not continuously spray hardscape if the landscape can be irrigated more efficiently.
Repeated overspray can contribute to:
Mineral deposits
Staining
Joint erosion
Unnecessary moisture
Water waste
Drip irrigation may be appropriate for many planting areas adjacent to patios and walkways.
Irrigation lines should also be considered before pavers are installed.
If future repairs are likely, sleeves or accessible routes can sometimes reduce the need to disturb completed hardscape later.
Water Problems Usually Become Visible at the Surface
Poor water management can eventually appear as:
Standing water
Sinking pavers
Erosion
Washed-out joints
Edge movement
Low spots
Staining
Saturated planting areas
The visible symptom may appear to be a paver problem even though the actual cause is water.
That is why drainage should never be treated as an optional finishing detail.
Pavers manage foot traffic and vehicles. The drainage system manages water. A successful landscape needs both systems working together.
Paver Patios: Designing Outdoor Living Spaces That Actually Work
A paver patio should be more than a rectangle of paving behind the house.
It should create usable outdoor space.
For many San Diego homeowners, the patio becomes an extension of the home—a place for morning coffee, family dinners, barbecues, entertaining, relaxing, and spending time outside throughout the year.
The most successful patios begin with understanding how the space will actually be used.
A thoughtful Landscape Design Process should establish the patio's size, shape, circulation, furniture, surrounding landscape, and relationship to the home before the paving pattern is finalized.
Design for Furniture Before Choosing the Patio Size
One of the easiest mistakes to make is designing a patio without placing the furniture on the plan.
A dining table does not only require room for the table.
It also needs room for:
Chairs
People sitting in the chairs
Chairs being pulled out
People walking behind seated guests
Serving food
Moving between different outdoor areas
The same applies to lounge furniture.
A sofa, coffee table, accent chairs, and side tables can occupy substantially more room than homeowners expect.
Design the patio around the complete furniture arrangement—not just the dimensions of one piece.
Think About How People Move Through the Space
Outdoor circulation is extremely important.
Ask how people will travel between:
The house
Patio
Outdoor kitchen
Pool
Lawn
Side yard
Fire feature
Pergola
Garden
Gates
A major walking route should not cut directly through the middle of a dining table.
Likewise, guests should not need to squeeze between furniture and planting every time they walk to another part of the yard.
Good circulation can make even a modest-sized patio feel comfortable.
Poor circulation can make a large patio feel awkward.
Outdoor Kitchens Need Working Space
If the patio will include an outdoor kitchen, the kitchen should be incorporated into the layout from the beginning.
A professionally planned Outdoor Kitchen And Fire Features Contractor project may include:
Built-in barbecue
Counter space
Bar seating
Refrigerator
Storage
Sink
Side burners
Pizza oven
Serving areas
Each feature affects patio dimensions.
Appliance doors need room to open.
The cook needs space to work.
Guests need room to sit without blocking circulation.
Utilities may also need to reach the kitchen before the pavers are installed.
Planning those requirements afterward can mean removing completed paving to install gas, electrical, water, or drainage connections.
Shade Changes How a Patio Is Used
A beautiful patio exposed to strong afternoon sun may not be comfortable during the hours homeowners want to use it most.
Shade can be created with:
Pergolas
Patio covers
Umbrellas
Shade trees
Architectural structures
The location of shade should be considered along with the sun's movement across the property.
It may not be necessary to shade the entire patio.
Instead, homeowners might create a shaded dining area while leaving another portion open to the sun.
Use Pavers to Define Different Outdoor Areas
Pavers can help visually organize a backyard.
Design techniques may include:
Changing laying patterns
Adding borders
Using contrasting bands
Changing paver sizes
Creating separate patio zones
Coordinating multiple complementary materials
For example, one paver pattern might define the primary dining patio while a border subtly separates a nearby fire-feature area.
These changes should remain intentional.
Too many patterns, colors, and borders can make a smaller yard feel unnecessarily busy.
Coordinate the Patio With the Architecture
The paver should look like it belongs with the home.
Consider:
Architectural style
Exterior paint colors
Roof material
Existing masonry
Existing concrete
Window and door detailing
Interior flooring visible through large doors
Other hardscape on the property
A contemporary home may benefit from large-format, cleaner paving patterns.
A Spanish or Mediterranean property may call for warmer colors, textured surfaces, or more traditional patterns.
There is no universal “best” paver style.
The best choice is the one that helps connect the home and landscape.
Leave Room for Planting
A patio does not need to extend across every available square foot.
Planting can soften the edges of hardscape and make an outdoor living area feel more comfortable.
Strategically placed landscape areas can provide:
Privacy
Shade
Seasonal color
Fragrance
Texture
Screening
Visual depth
Planting also creates separation between outdoor rooms without requiring walls.
In many cases, reducing the amount of paving slightly can produce a more balanced landscape.
Consider Lighting Before the Patio Is Finished
Outdoor living does not stop when the sun goes down.
Landscape lighting can improve circulation while highlighting the patio, planting, walls, trees, steps, and architectural features around it.
If electrical sleeves or wiring pathways need to cross beneath the pavers, they should be considered before installation.
A future lighting project is much easier when infrastructure has already been anticipated.
Plan for Future Improvements
Homeowners may not build the entire outdoor environment at once.
A patio might be installed today while future plans include:
Outdoor kitchen
Pergola
Fire feature
Landscape lighting
Additional planting
Pool or spa
Expanded seating
A complete design can reserve the space and infrastructure needed for those future improvements.
That can prevent a common and expensive problem:
Removing finished pavers several years later because the future feature was never considered.
The Best Patio Is Designed Around the People Who Will Use It
Paver selection matters.
Installation matters.
But the success of an outdoor living space ultimately depends on whether it works for the homeowner.
A good patio should have enough room to gather, comfortable circulation, appropriate shade, useful connections to the rest of the property, and materials that complement the home.
Do not start by asking, “Which paver should we use?” Start by asking, “How do we want to live in this space?”
Frequently Asked Questions
-
Ideally, the pool and surrounding landscape should be planned together.
The location and shape of the pool can affect patios, walkways, drainage, privacy, planting, outdoor kitchens, fire features, pergolas, lighting, and circulation throughout the backyard.
Beginning with a complete Landscape Design Process helps homeowners understand how all of these elements can work together before major construction begins.
-
Yes.
Nature's Elements Landscaping can design the complete outdoor environment surrounding a proposed pool or spa, including hardscape, planting, irrigation, drainage, landscape lighting, retaining walls, fencing, pergolas, outdoor kitchens, fire features, and other landscape improvements.
Specialized pool construction and other regulated portions of the project should be completed by the appropriately licensed professionals responsible for that work.
-
Yes.
An existing pool can often become the centerpiece of a completely redesigned backyard.
The surrounding patios, planting, lighting, privacy, irrigation, drainage, walls, outdoor living areas, and other landscape features can be reevaluated without necessarily replacing the swimming pool itself.
-
Frequently, yes.
Pool excavation, decking, patios, walls, and equipment areas can interfere with an existing irrigation system.
Existing lines may need to be rerouted or abandoned, and new planting areas may require completely different irrigation zones.
It is important to understand what existing irrigation lines serve before cutting or capping them.
-
A pool project introduces large areas of hard surface into the backyard.
Rainwater, irrigation runoff, and other surface water need to be directed appropriately so they do not collect around the home, pool deck, planting areas, or other structures.
Good Drainage planning should be incorporated before patios and landscaping are completed.
-
Yes.
Pergolas and other shade structures can help create comfortable outdoor rooms around the swimming pool.
Placement should consider sun exposure, furniture, views, circulation, foundations, drainage, utilities, and applicable permit requirements.
Learn more about our Decks And Pergolas Contractor services.
-
Pool and spa construction generally requires permits from the local jurisdiction.
Depending on the property and scope of work, additional permits or professional services may also be required for retaining walls, structures, electrical systems, gas, grading, or other improvements.
Homeowners should verify current requirements with the applicable building authority and the professionals responsible for those portions of the project.
-
There is no single dimension that works for every property.
The amount of space needed depends on how homeowners plan to use the backyard.
The design should provide enough room for circulation, lounge furniture, dining, landscaping, access, shade, and any outdoor living features being considered.
In many cases, slightly reducing the size of the pool can create a much more functional overall backyard.
-
There is no single best material for every project.
Common choices include:
Concrete
Concrete pavers
Porcelain pavers
Natural stone
Travertine
The best choice depends on the architecture of the home, budget, installation conditions, appearance, maintenance expectations, surface temperature, wet-area performance, and how the material connects with the rest of the landscape.
A professionally planned Hardscape And Concrete Contractor scope can help coordinate those surrounding surfaces as part of the complete backyard design.
-
Poolside plants should be selected for the specific property.
Important considerations include:
Mature size
Root characteristics
Sun exposure
Heat
Water requirements
Maintenance
Plant debris
Privacy
Available planting space
Plants immediately beside the pool should generally be selected more carefully than plants located farther away.
-
Landscape lighting should ideally be planned before the surrounding hardscape is completed.
This allows sleeves, wiring routes, transformer locations, and future lighting access to be considered before permanent surfaces are installed.
A well-planned Landscape Low Voltage Lighting system can help illuminate pathways, steps, trees, walls, outdoor living spaces, and landscape features surrounding the pool.
-
Yes.
Outdoor kitchens, fire features, dining areas, shade structures, seating, and the swimming pool can all be coordinated within one outdoor plan.
Planning these elements together helps preserve circulation and ensures the backyard does not become overcrowded.
Homeowners considering these improvements can also explore our Outdoor Kitchen And Fire Features Contractor services.
-
Possibly.
Properties governed by a homeowners association may require architectural approval for swimming pools, walls, fencing, structures, landscape changes, materials, or other exterior improvements.
Homeowners should review their association's current architectural guidelines and approval process before beginning construction.
HOA approval does not replace required government permits.
-
Yes.
In fact, creating the entire plan before construction begins can be extremely helpful when a project will be completed over several years.
Utilities, drainage, access, hardscape elevations, and future structures can be anticipated so each phase supports the next.
Continue Planning Your Pool & Landscape Project
A swimming pool or spa can completely transform a backyard, but the water is only one part of the finished environment.
The most successful properties coordinate the pool with the landscape, hardscape, lighting, planting, drainage, irrigation, structures, and outdoor living spaces from the beginning.
Continue exploring these Nature's Elements Landscaping resources as you plan your project:
If you are planning a new pool, spa, or complete backyard remodel in San Diego, start with the entire property.
A thoughtful design can help coordinate the pool, surrounding landscape, outdoor living spaces, infrastructure, and future improvements before construction begins.
Design the backyard as one complete environment—not as a collection of separate projects.